Des pampilles de Noël illustrées
25/11/2021

Créez d’originales pièces d’argile, dessinez-y de petites scénettes inspirées du conte de Noël Michka et peuplez ainsi votre sapin de roitelet, de renne, d’ourson et de tout l’imaginaire des fêtes !
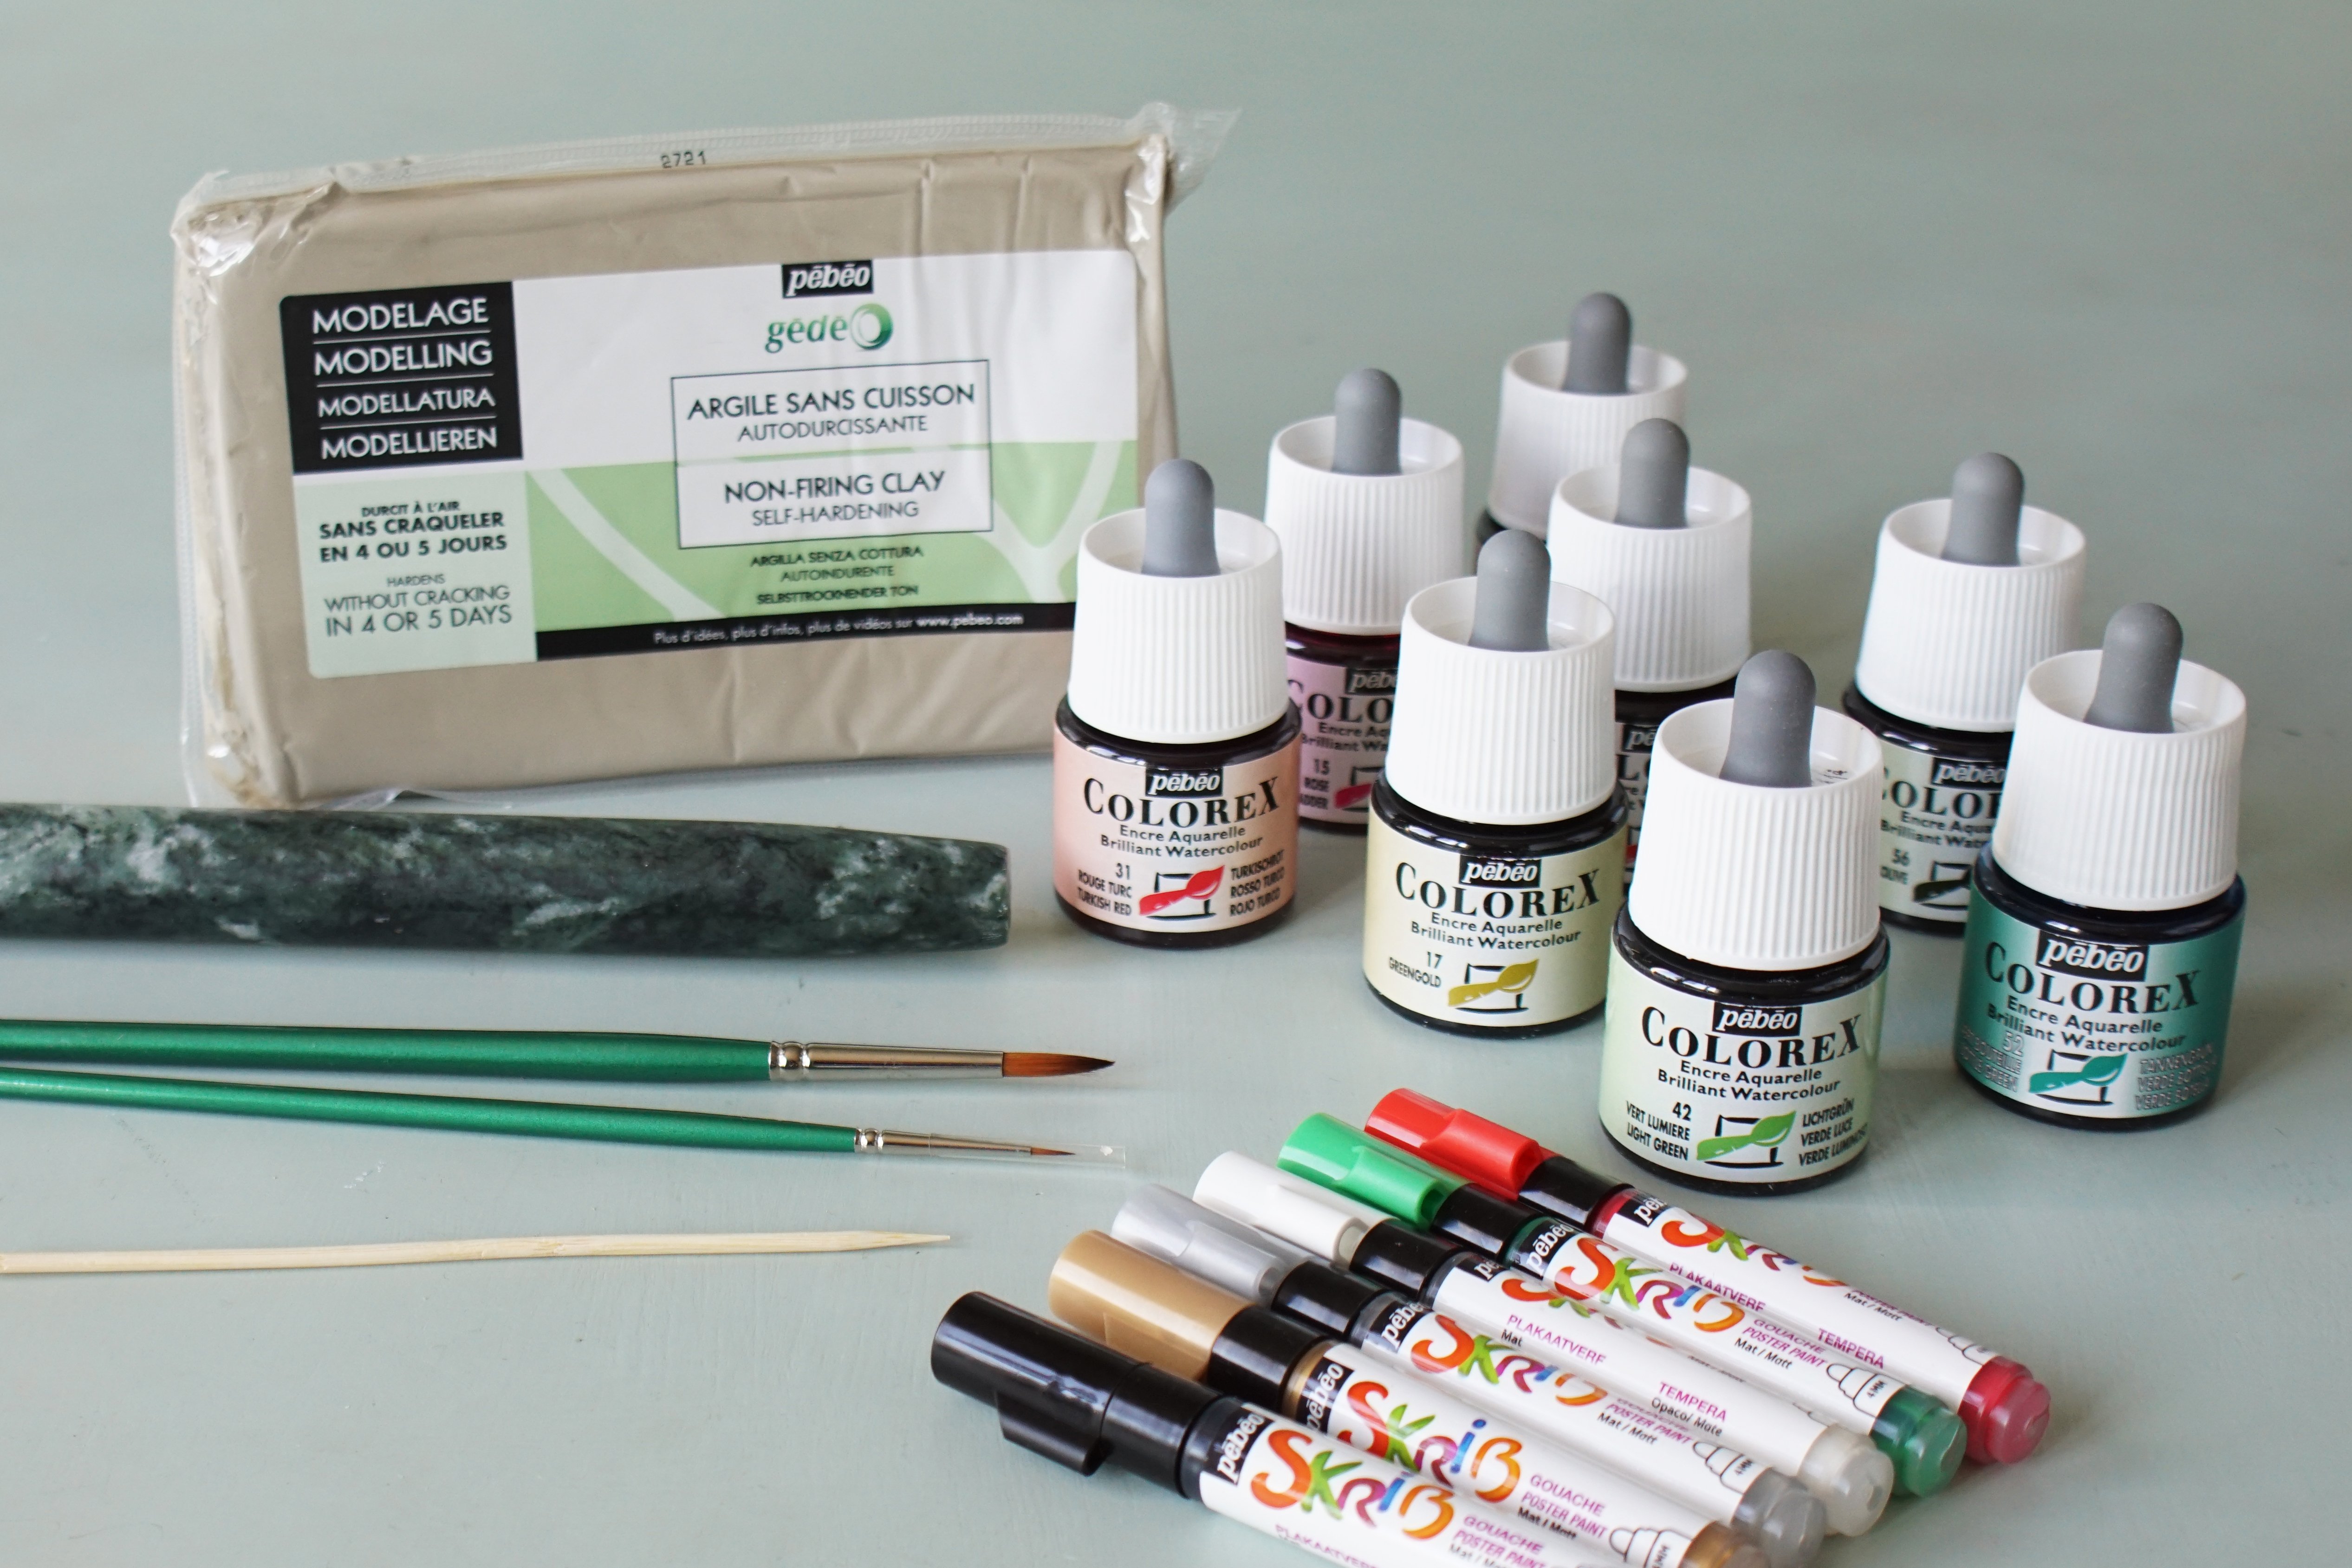
Matériels:
- De l’argile sans cuisson blanche, Des outils de modelage (rouleau, cure-dent) ,Des emporte-pièces ronds, ou des verres de différents diamètres, Un crayon à papier, De papier de verre fin
- Des encres Colorex
- Des pinceaux fins,
- Des feutres Skrib gouache,
- De la ficelle
Niveau de difficulté :
- Difficulté : moyenne - A partir de 6 ans
- Temps de séchage : séchage complet des papilles modelées : 72h / séchages des encres et feutres : 10 minutes
- Temps de réalisation : pour 5 pampilles : modelage des papilles et des perles : 1h environ / dessin et peintures des motifs : 2 heures
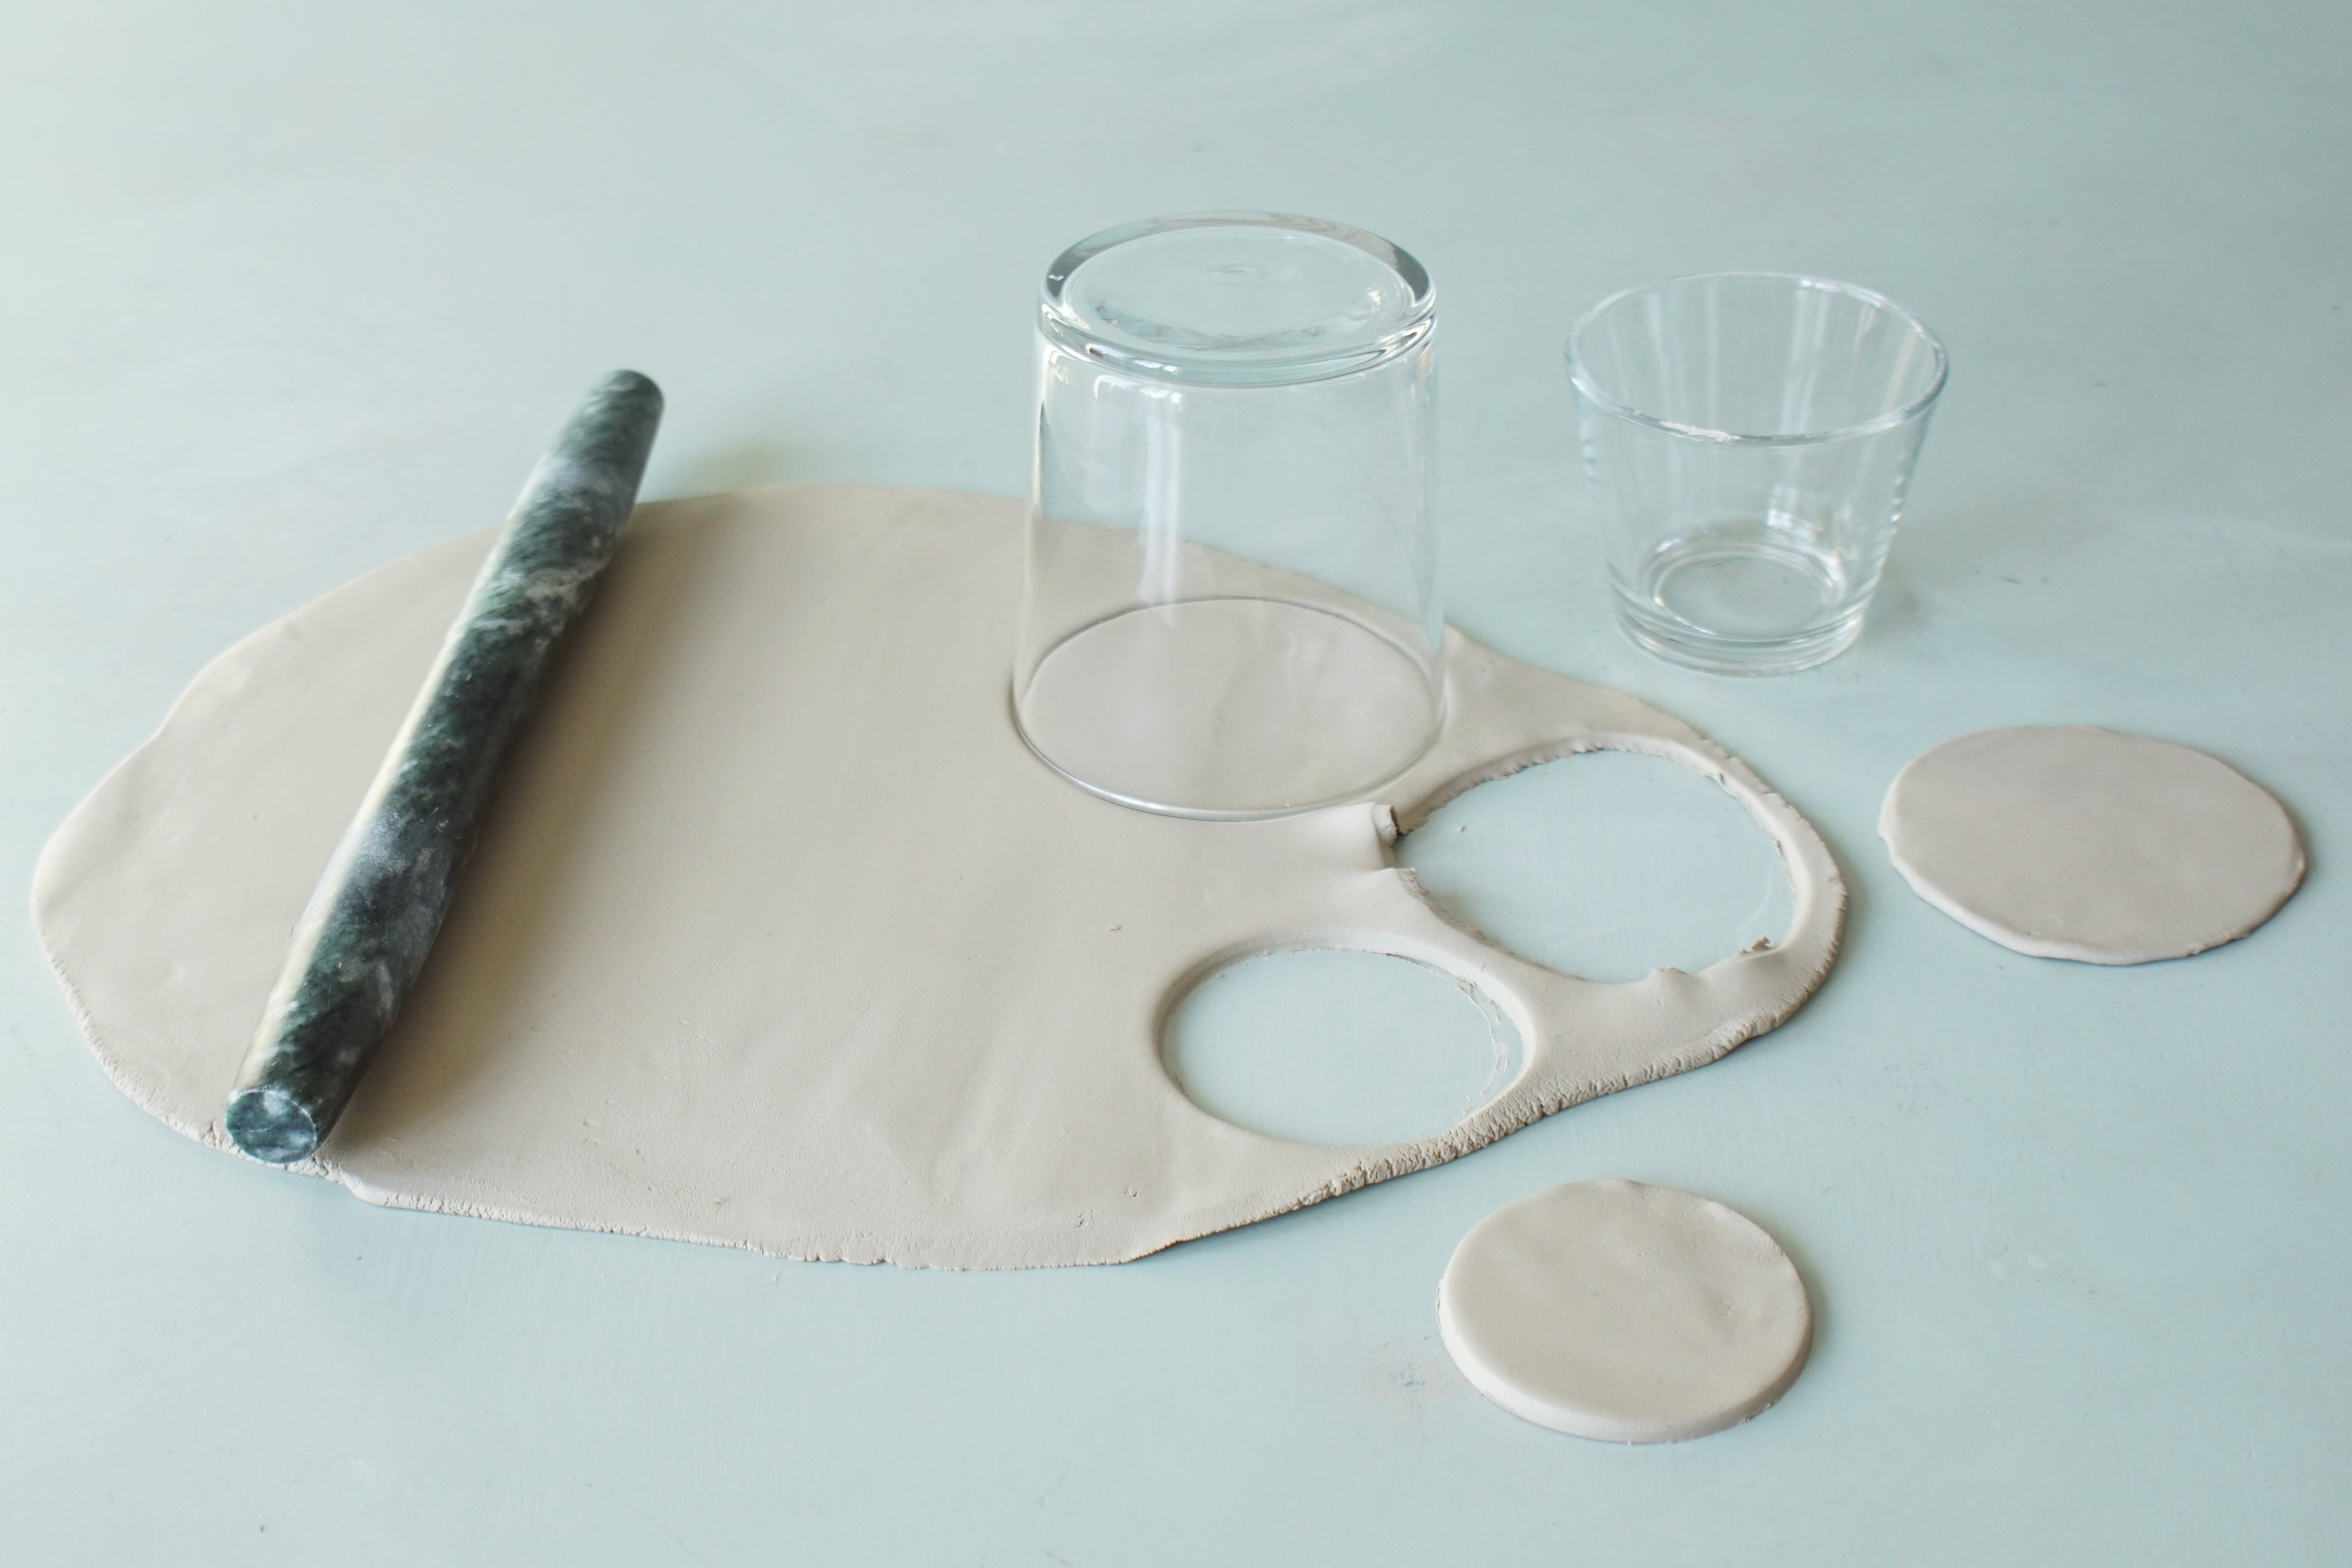
- Étalez l’argile pour obtenir une plaque d’environ 2mm d’épaisseur. Découpez des ronds dans cette plaque en vous servant d’emporte-pièces ou de verres de différents diamètres.
- Percez un trou dans le haut de chaque rond, et parfois aussi en bas sur certains. Modelez de petites perles rondes et d’autres en forme de gouttes. Percez–les avec le cure-dent. Si besoin, lissez toutes les formes au doigt, avec un peu d’eau.
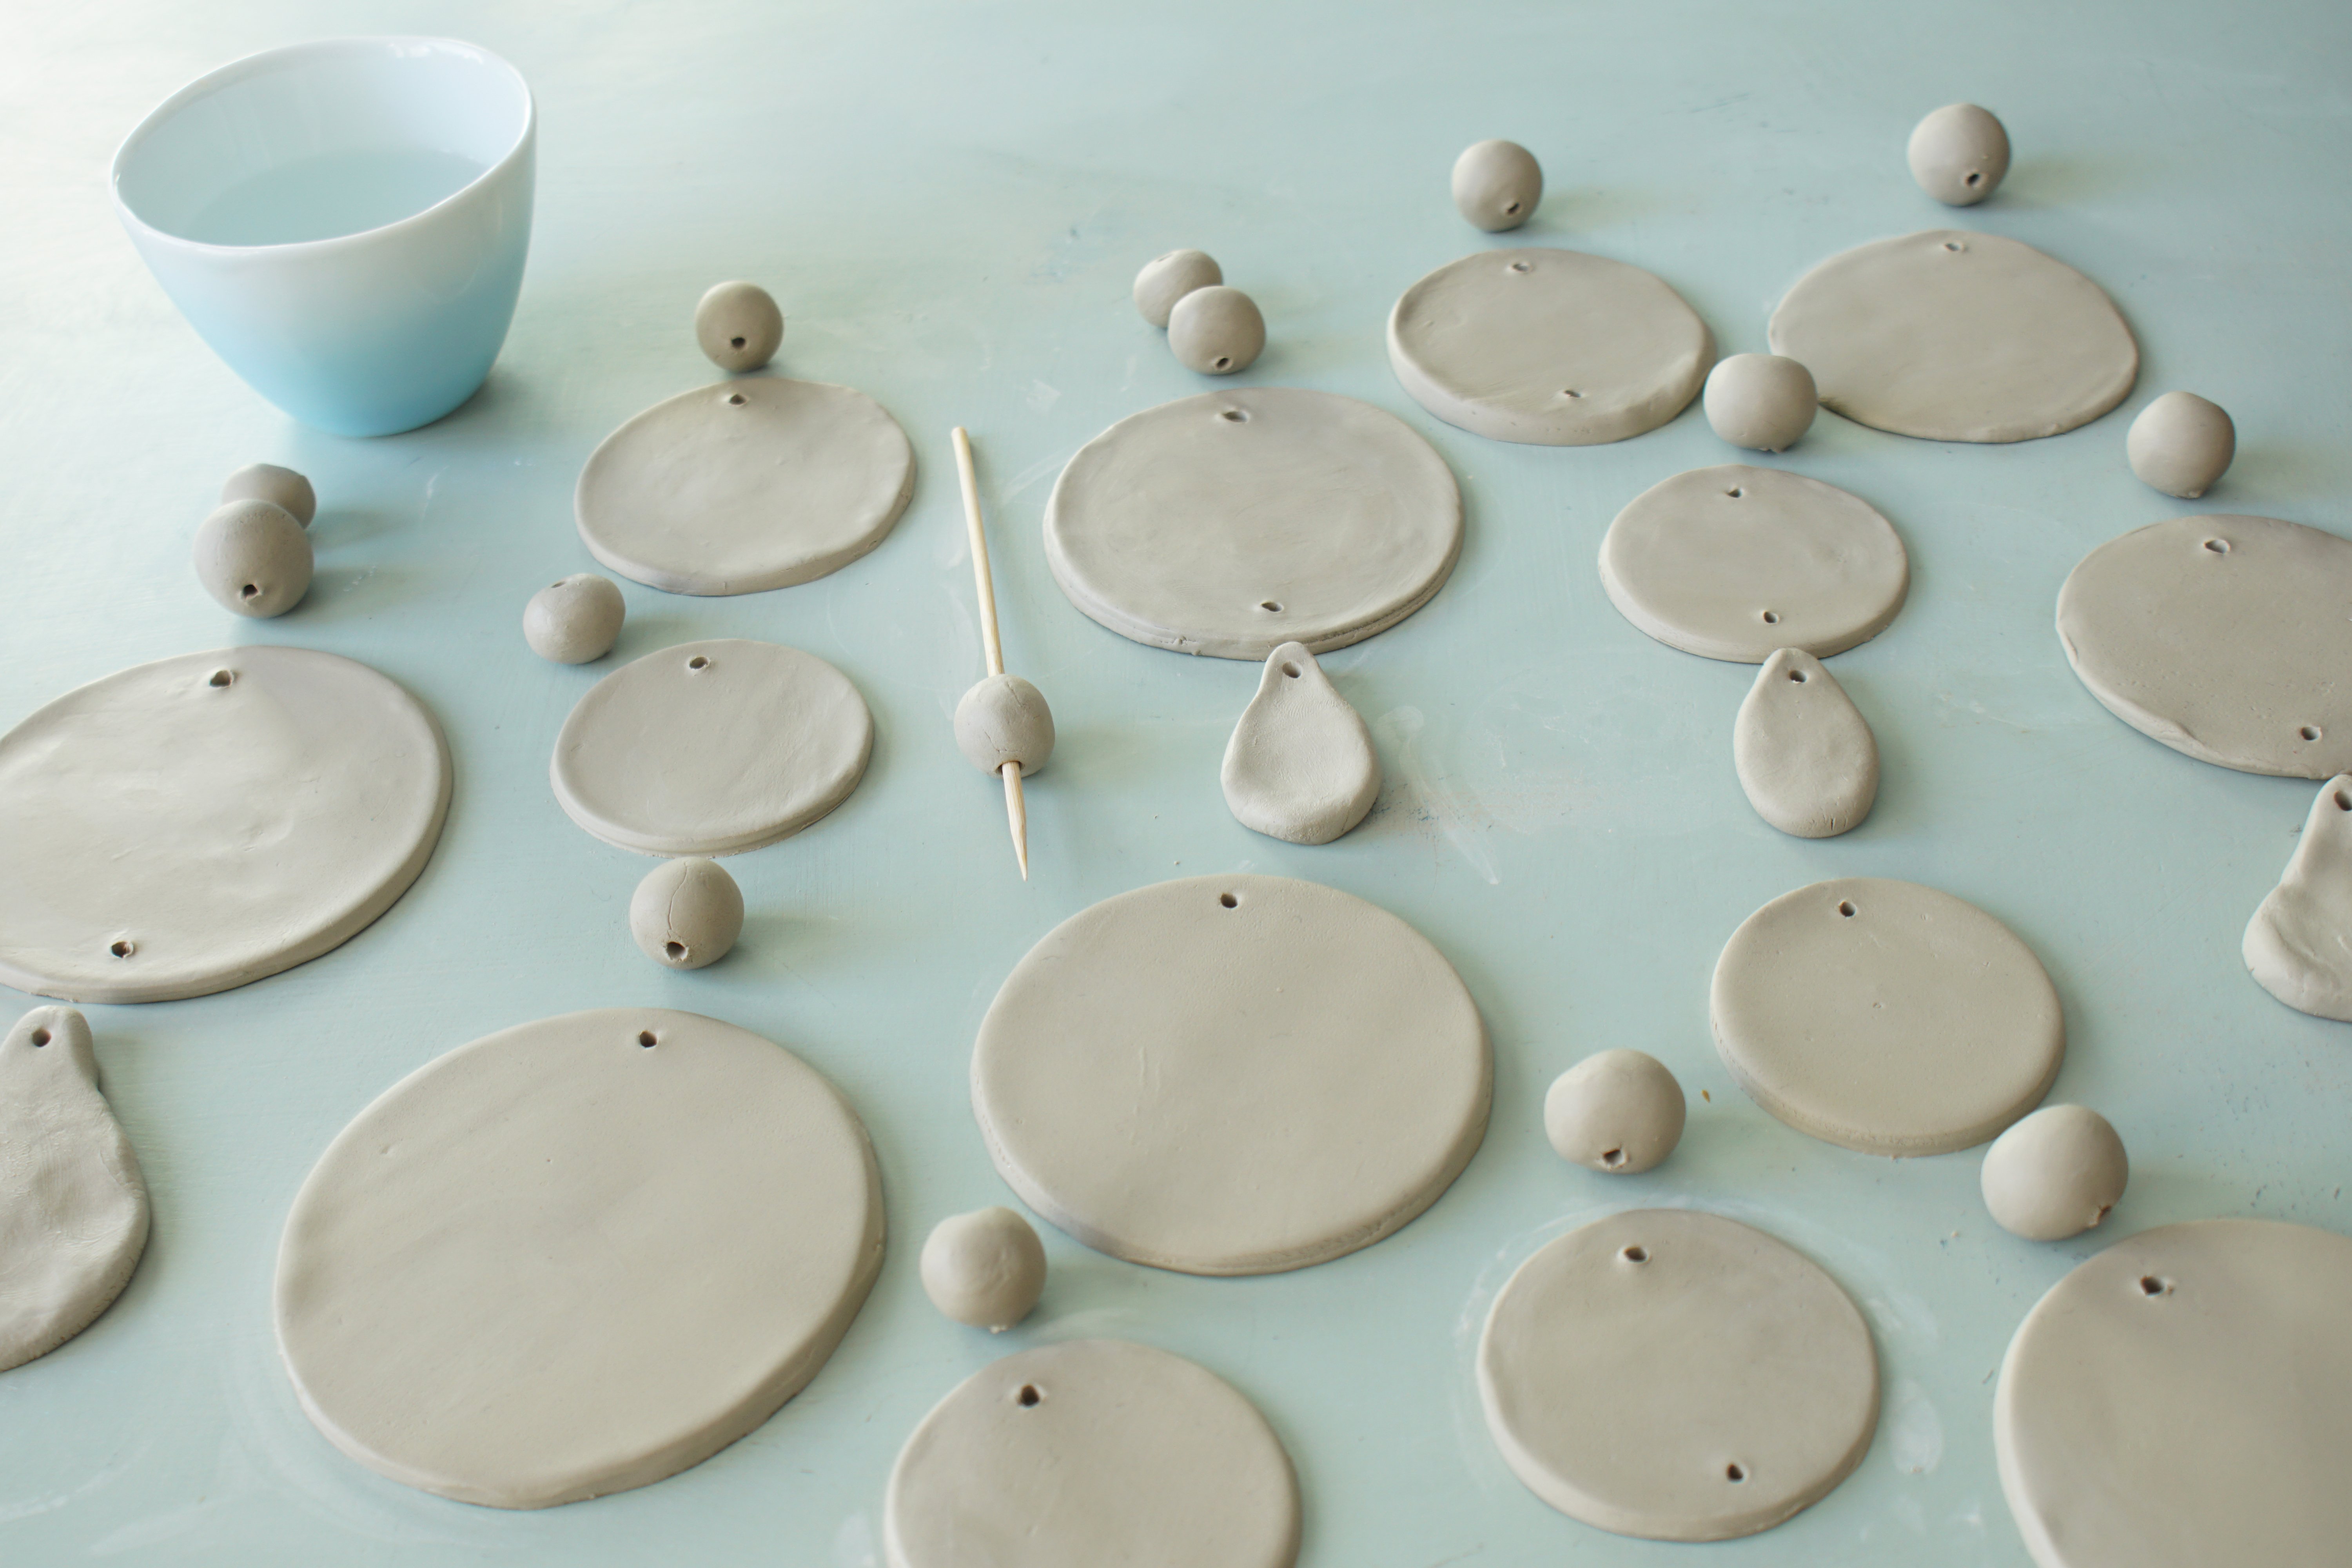
- Laissez sécher l’ensemble pendant 3 jours.
- Si nécessaire, poncez vos pièces au papier de verre fin une fois qu’elles sont bien sèches.
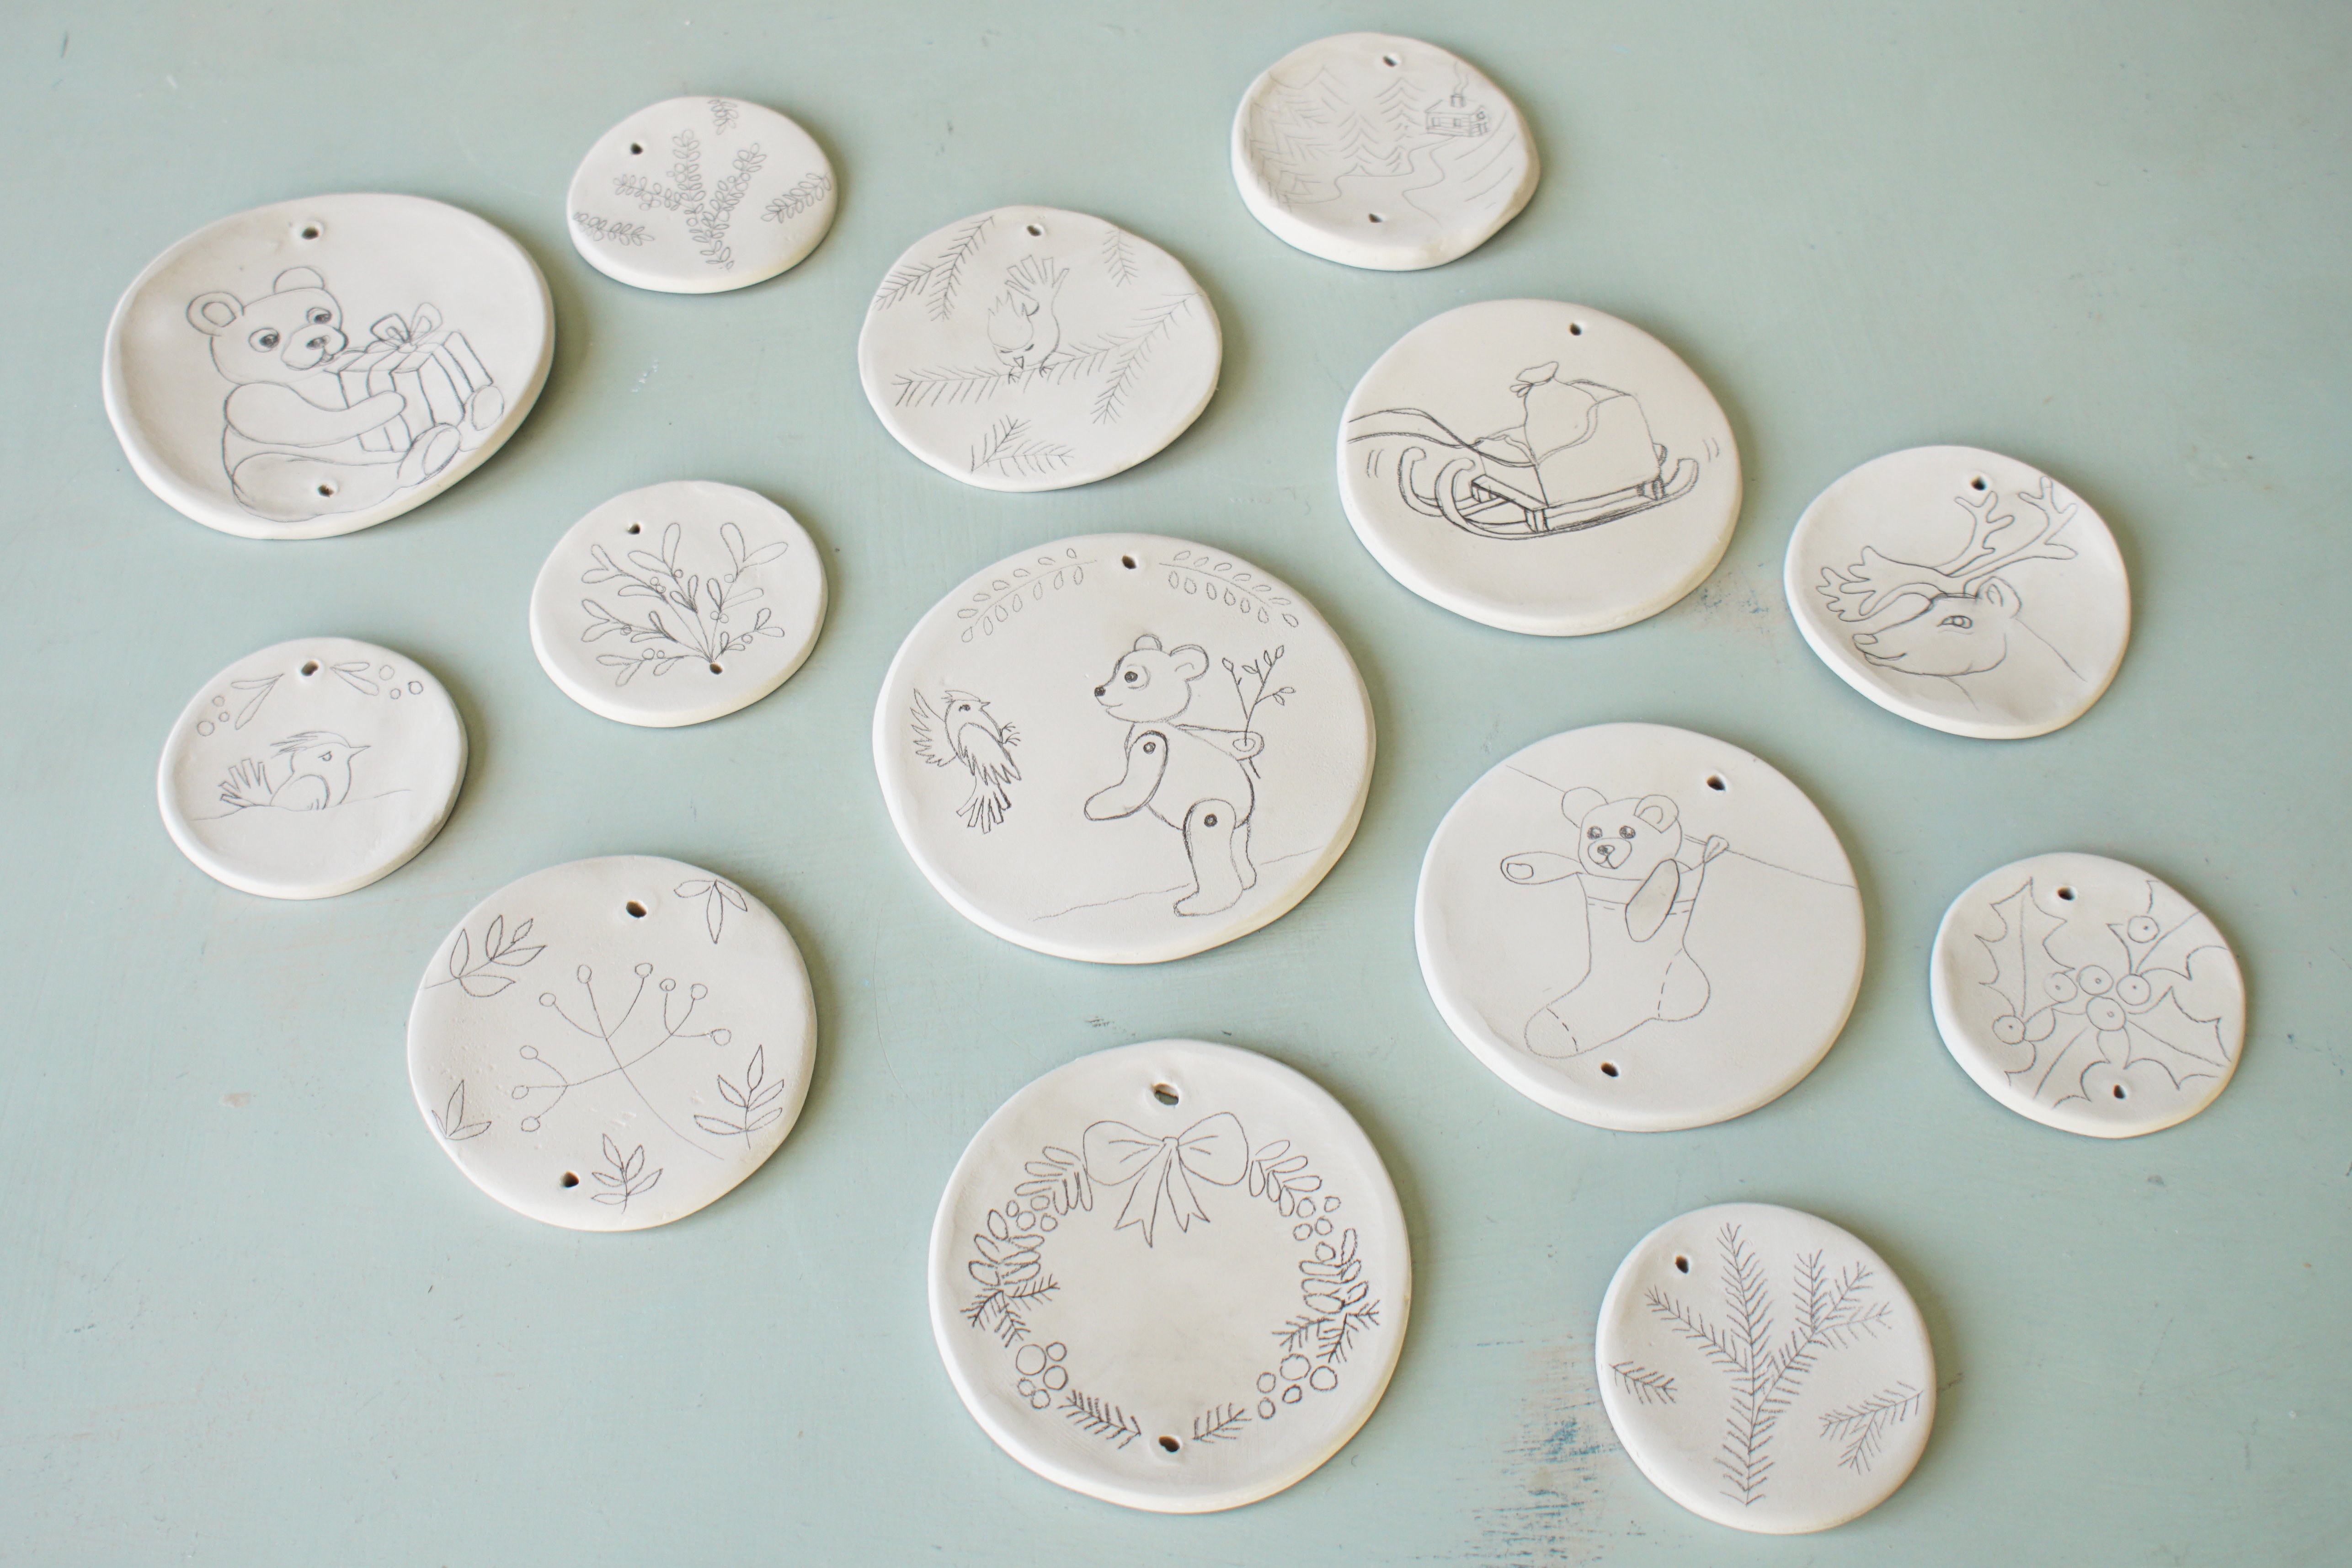
- En vous inspirant des photos des pampilles réalisées, dessinez de petites scénettes dans chaque rond. nous sommes inspirées du conte de Noël Michka pour dessiner un ours en peluche, un roitelet farceur, une forêt enneigée, des branches de houx et de gui, le renne de Noël, le traineau rempli de cadeaux, une chaussette de Noël avec un ourson…
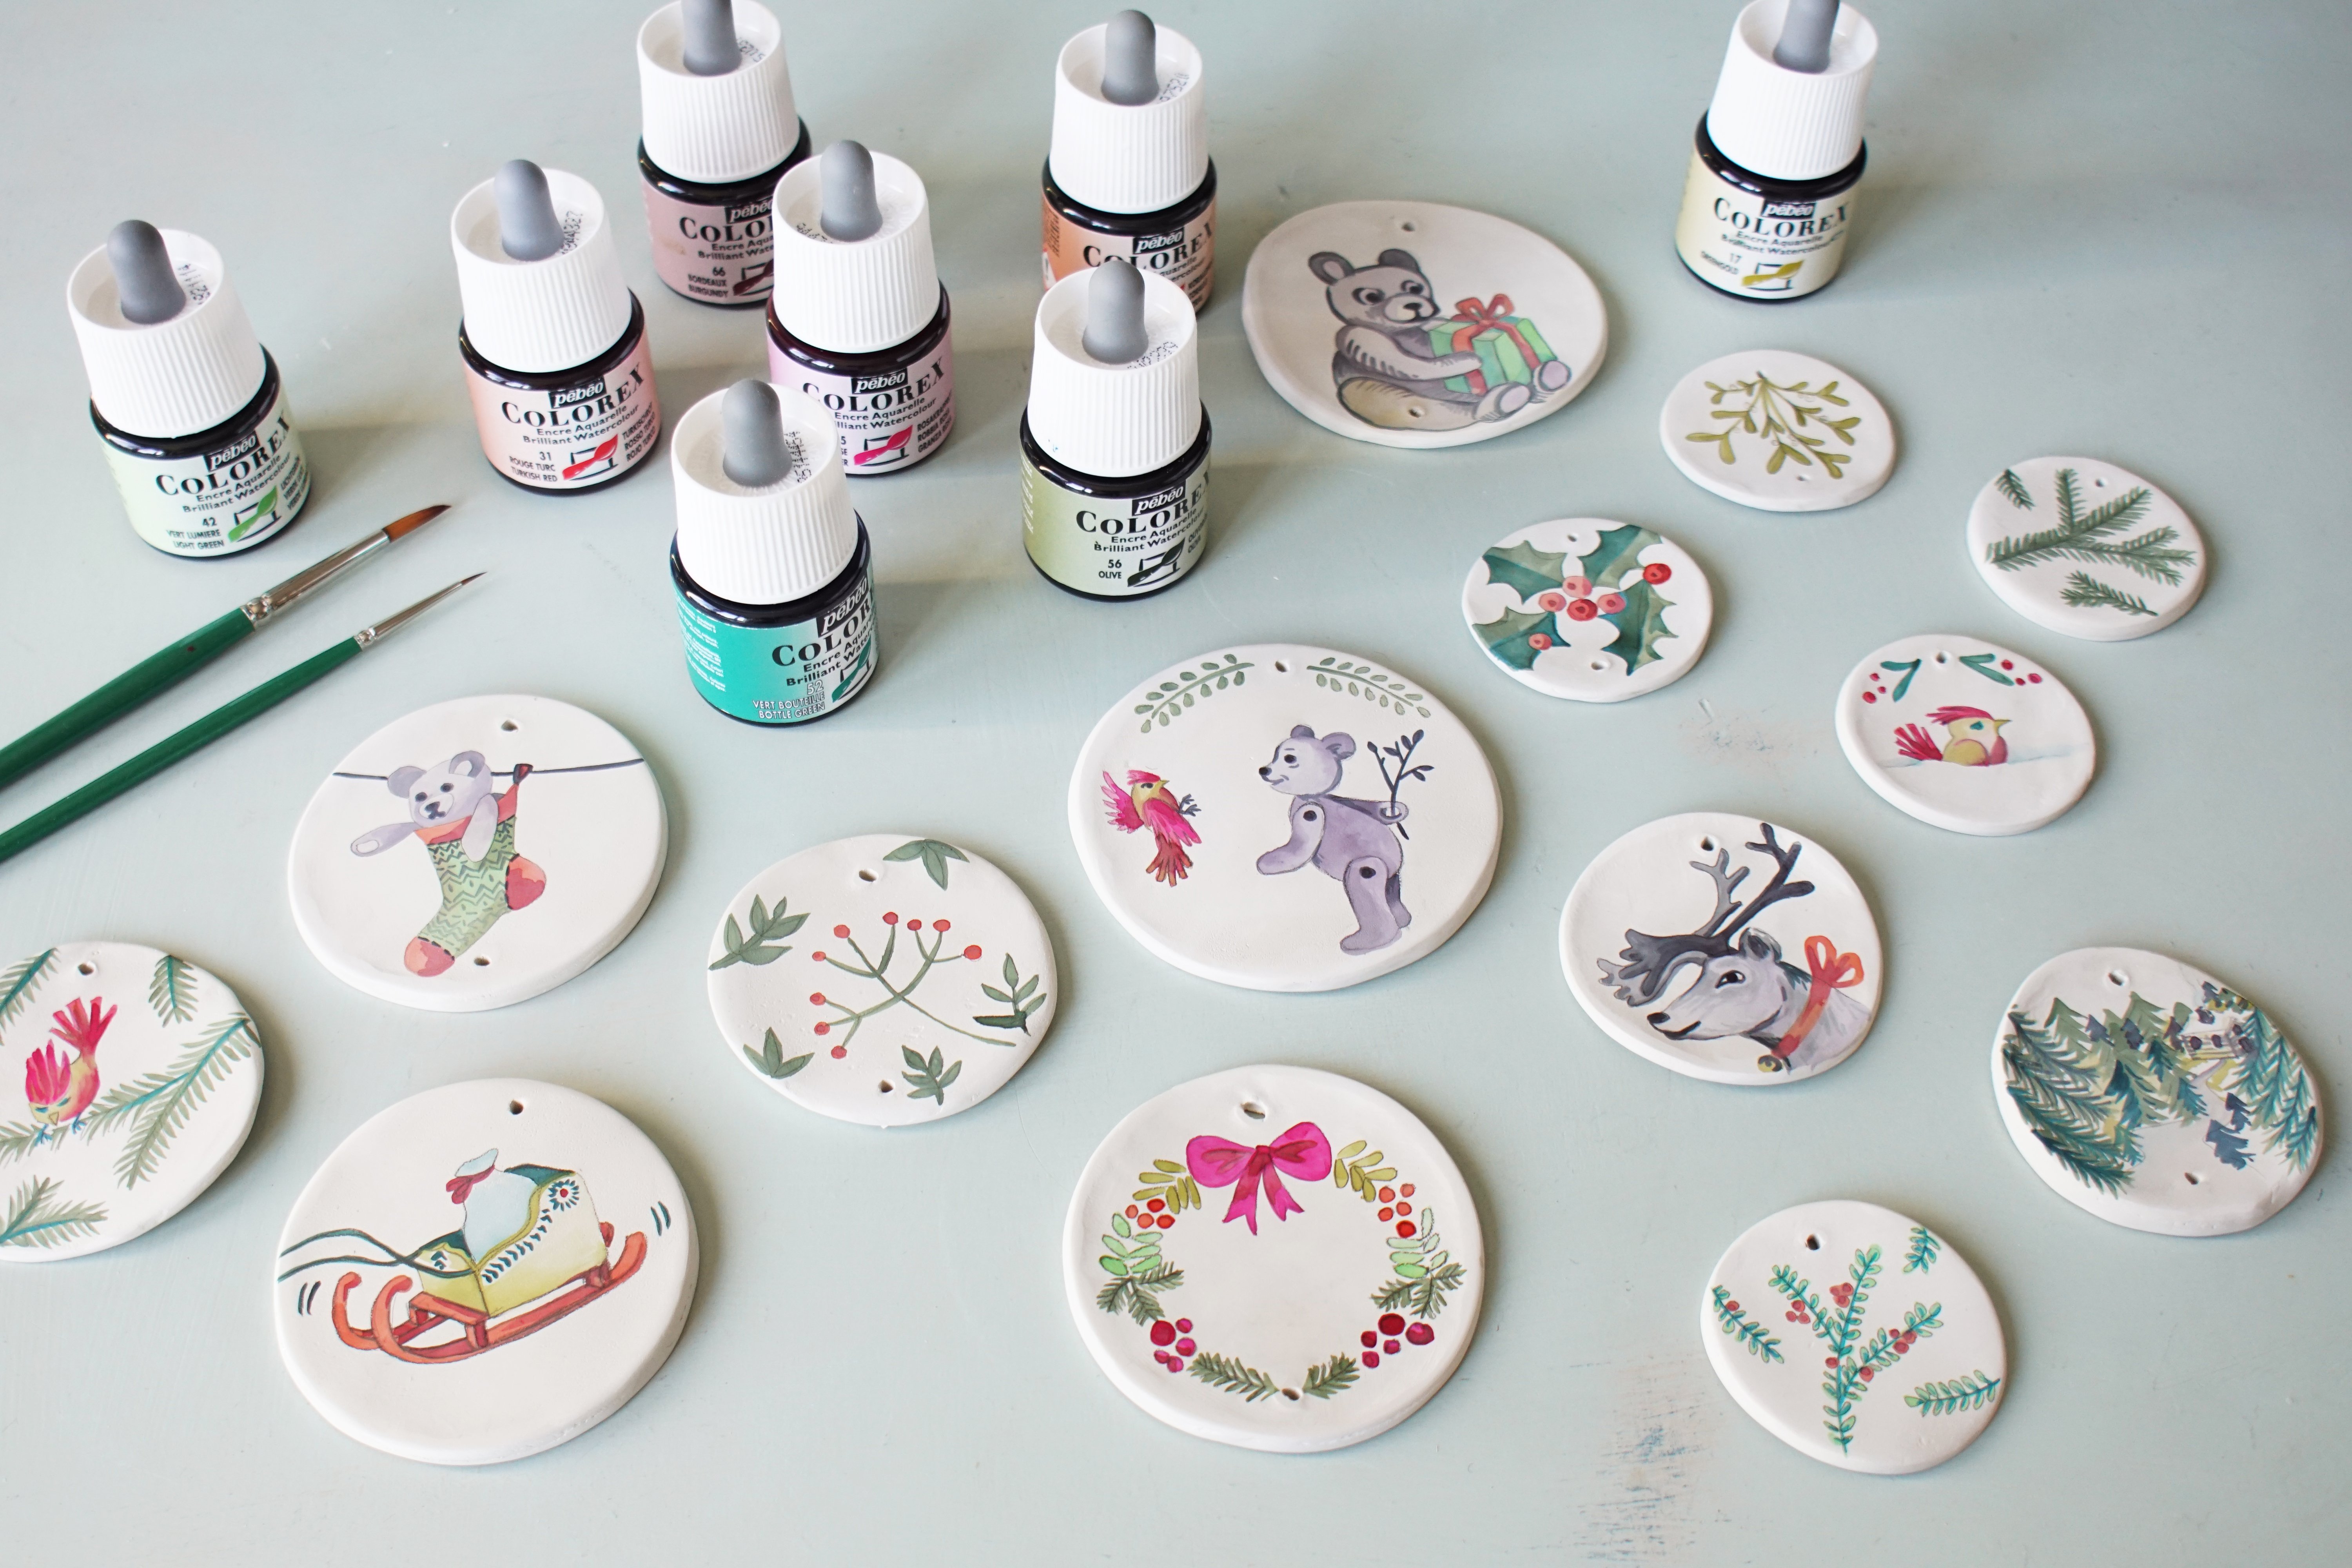
- Colorisez vos dessins à l’aide des encres et des pinceaux fins.
- Surlignez certains détails avec les feutres Skrib gouache.
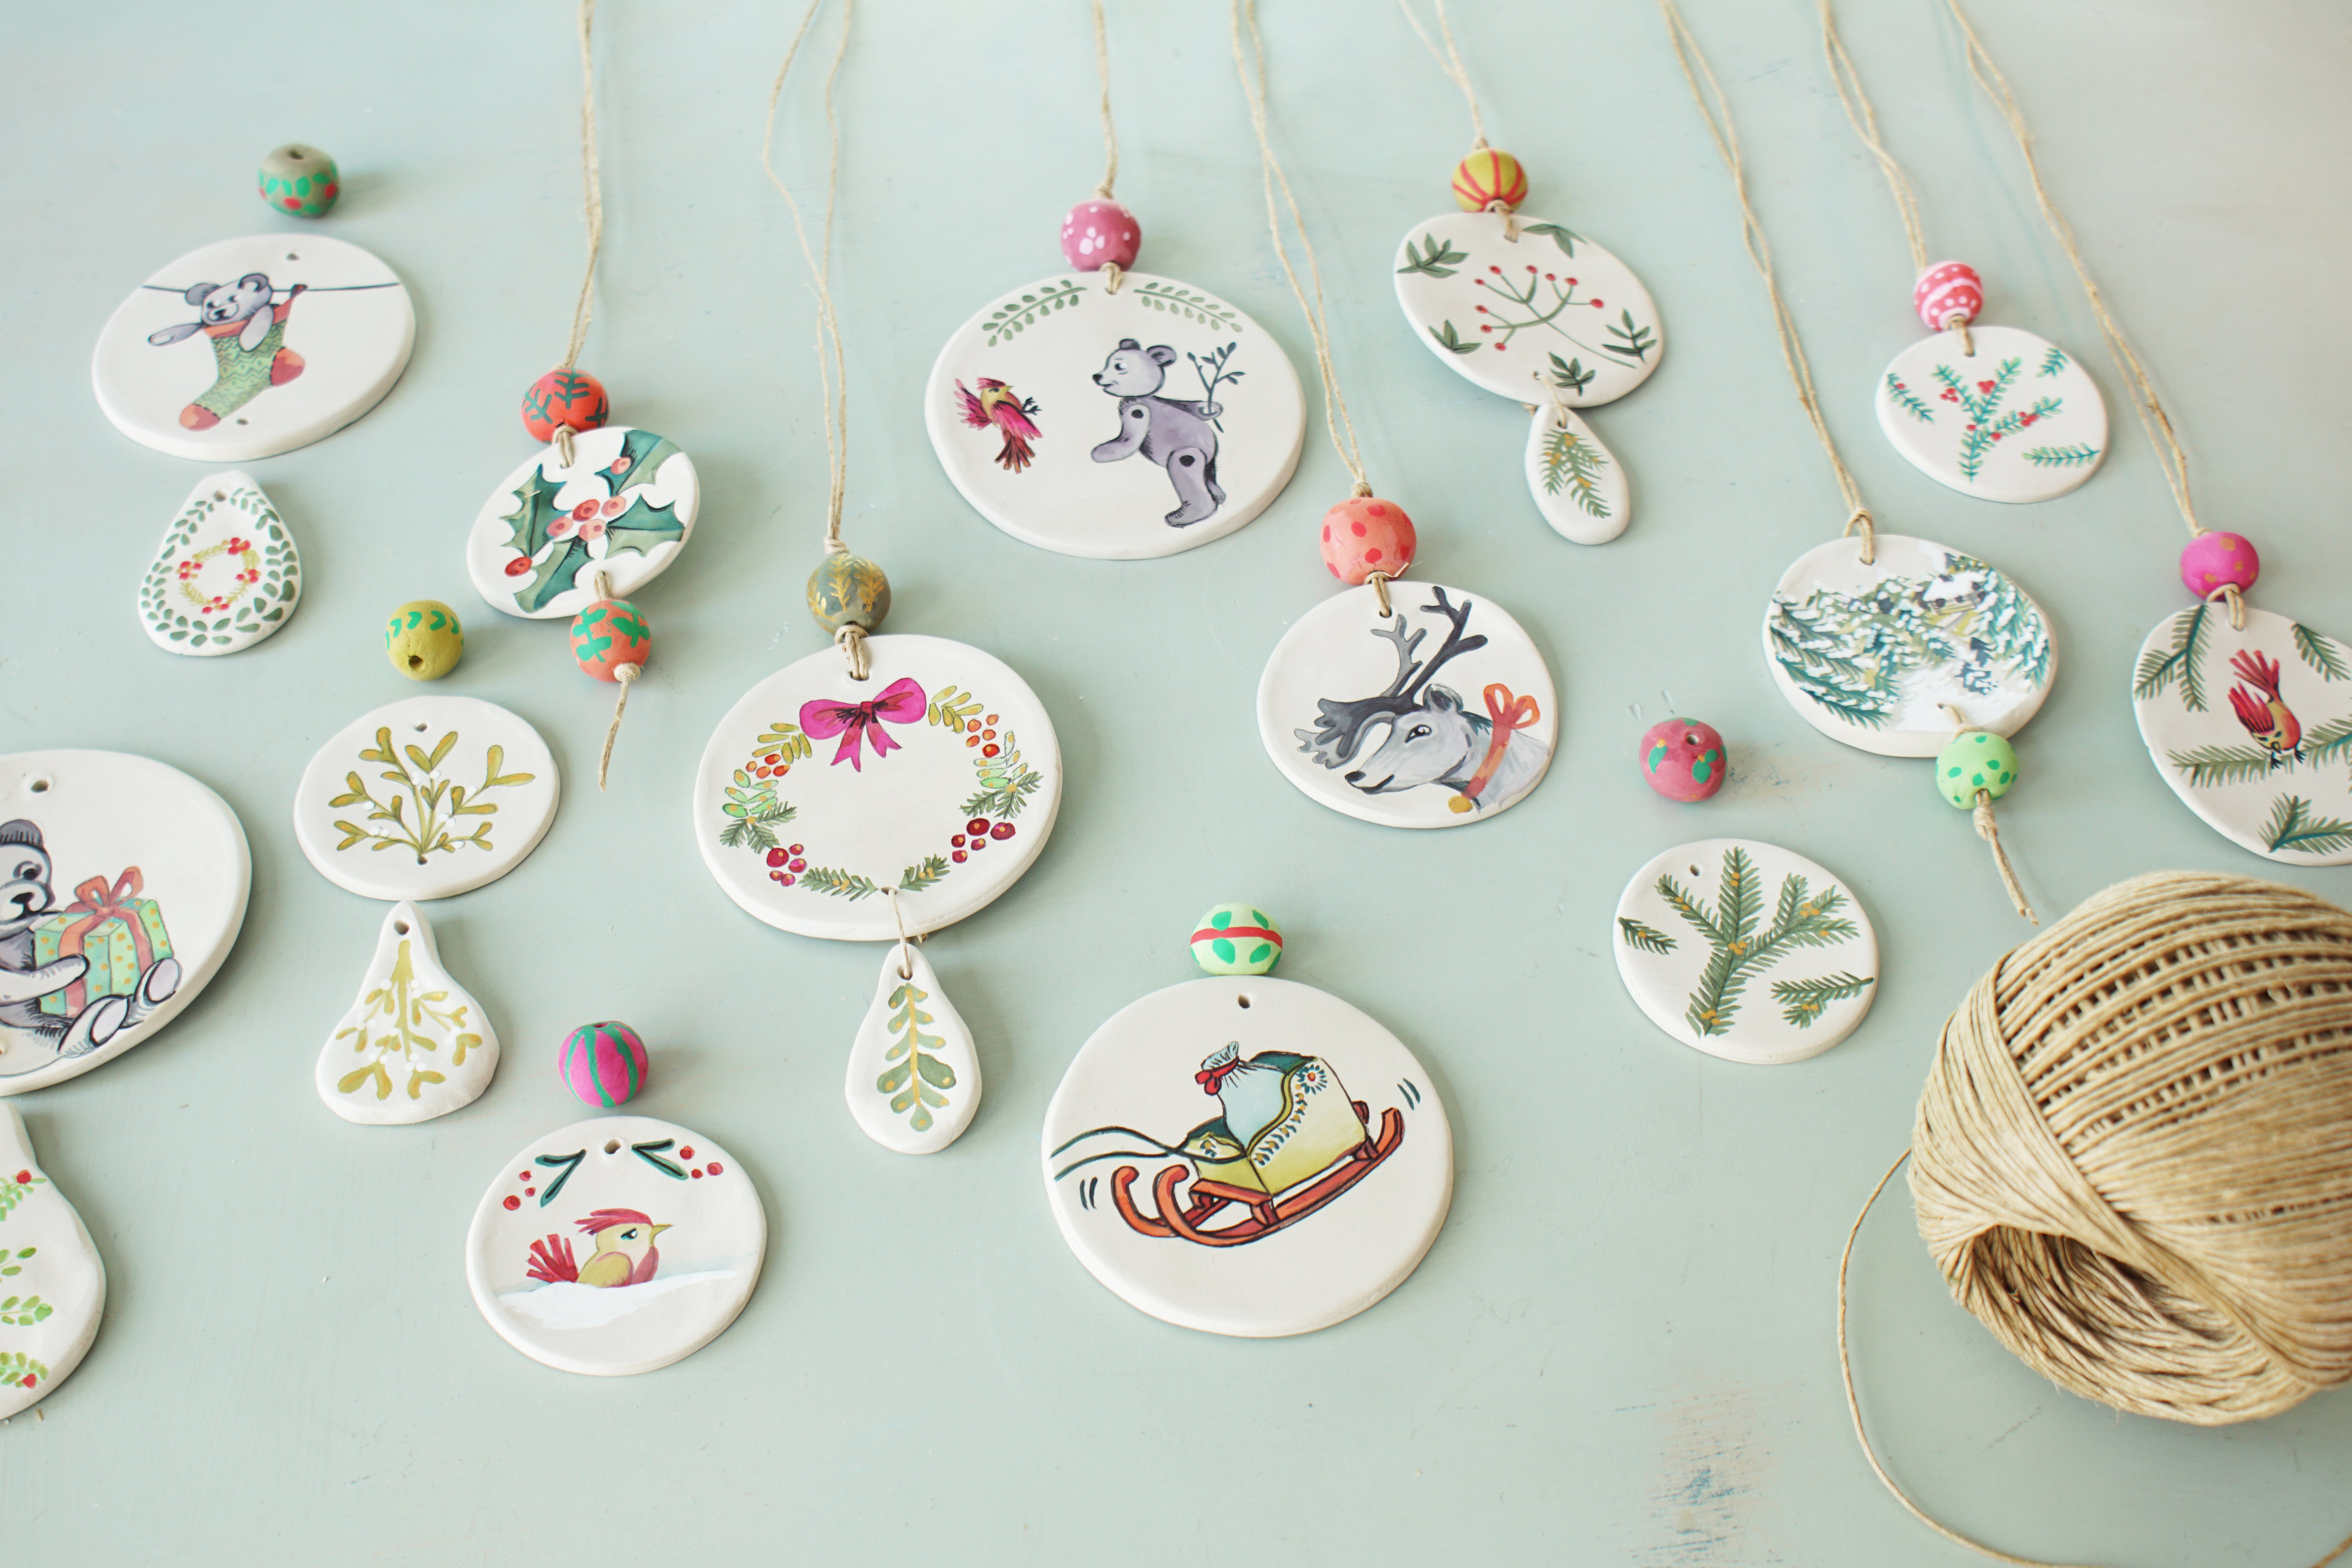
- Amusez-vous à peindre les perles et pampilles dans des coloris assortis et dessinez de petits motifs avec les feutres Skrib. Laissez sécher.
- Assemblez chaque pampille à l’aide de brins de ficelle, en laissant une bonne longueur en haut pour les accrocher aux branches des sapins, les suspendre en guirlande…
Téléchargements
Produits Connexes
à lire aussi


@PEBEO Suivre Pébéo sur Instagram

Newsletter
Inscrivez-vous à notre Newsletter et restez informé de nos actualités. Pour en savoir plus sur la gestion de vos données personnelles et pour exercer vos droits, cliquez, ici