Une broche nuage en résine
04/08/2022
Fabriquez une broche en forme de nuage à l’aide du kit Résine
et du siligum Pébéo.
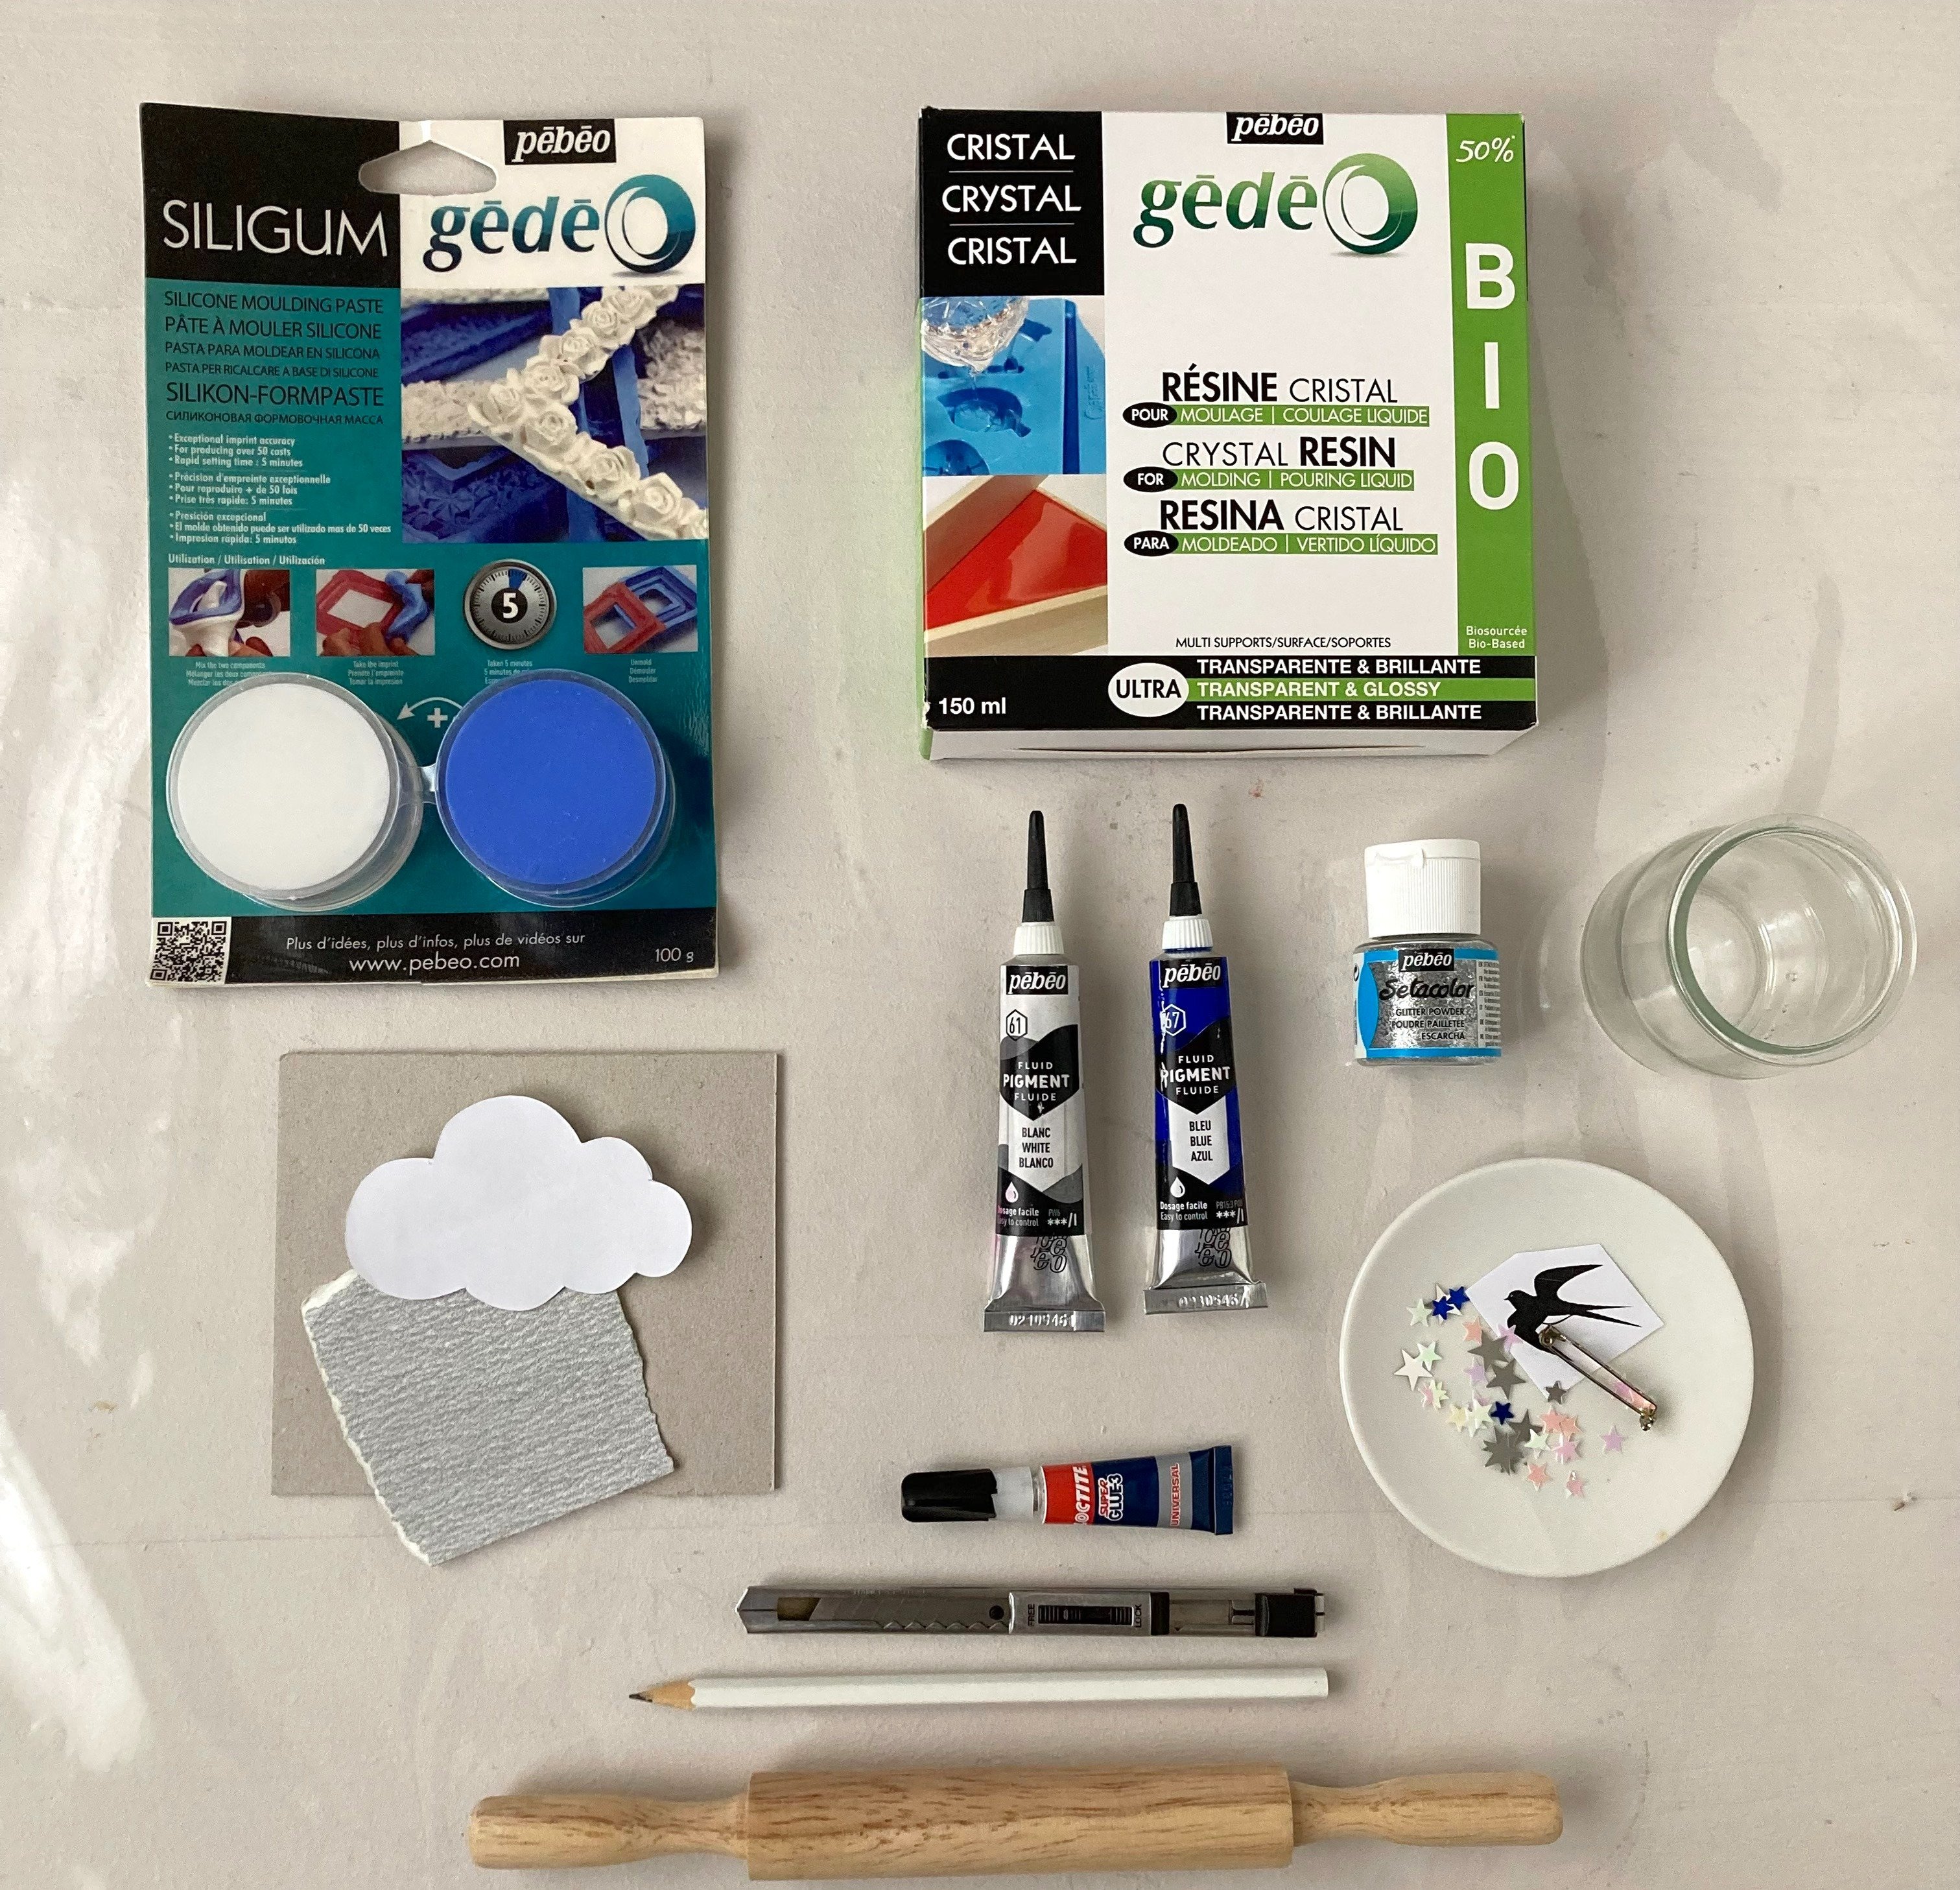
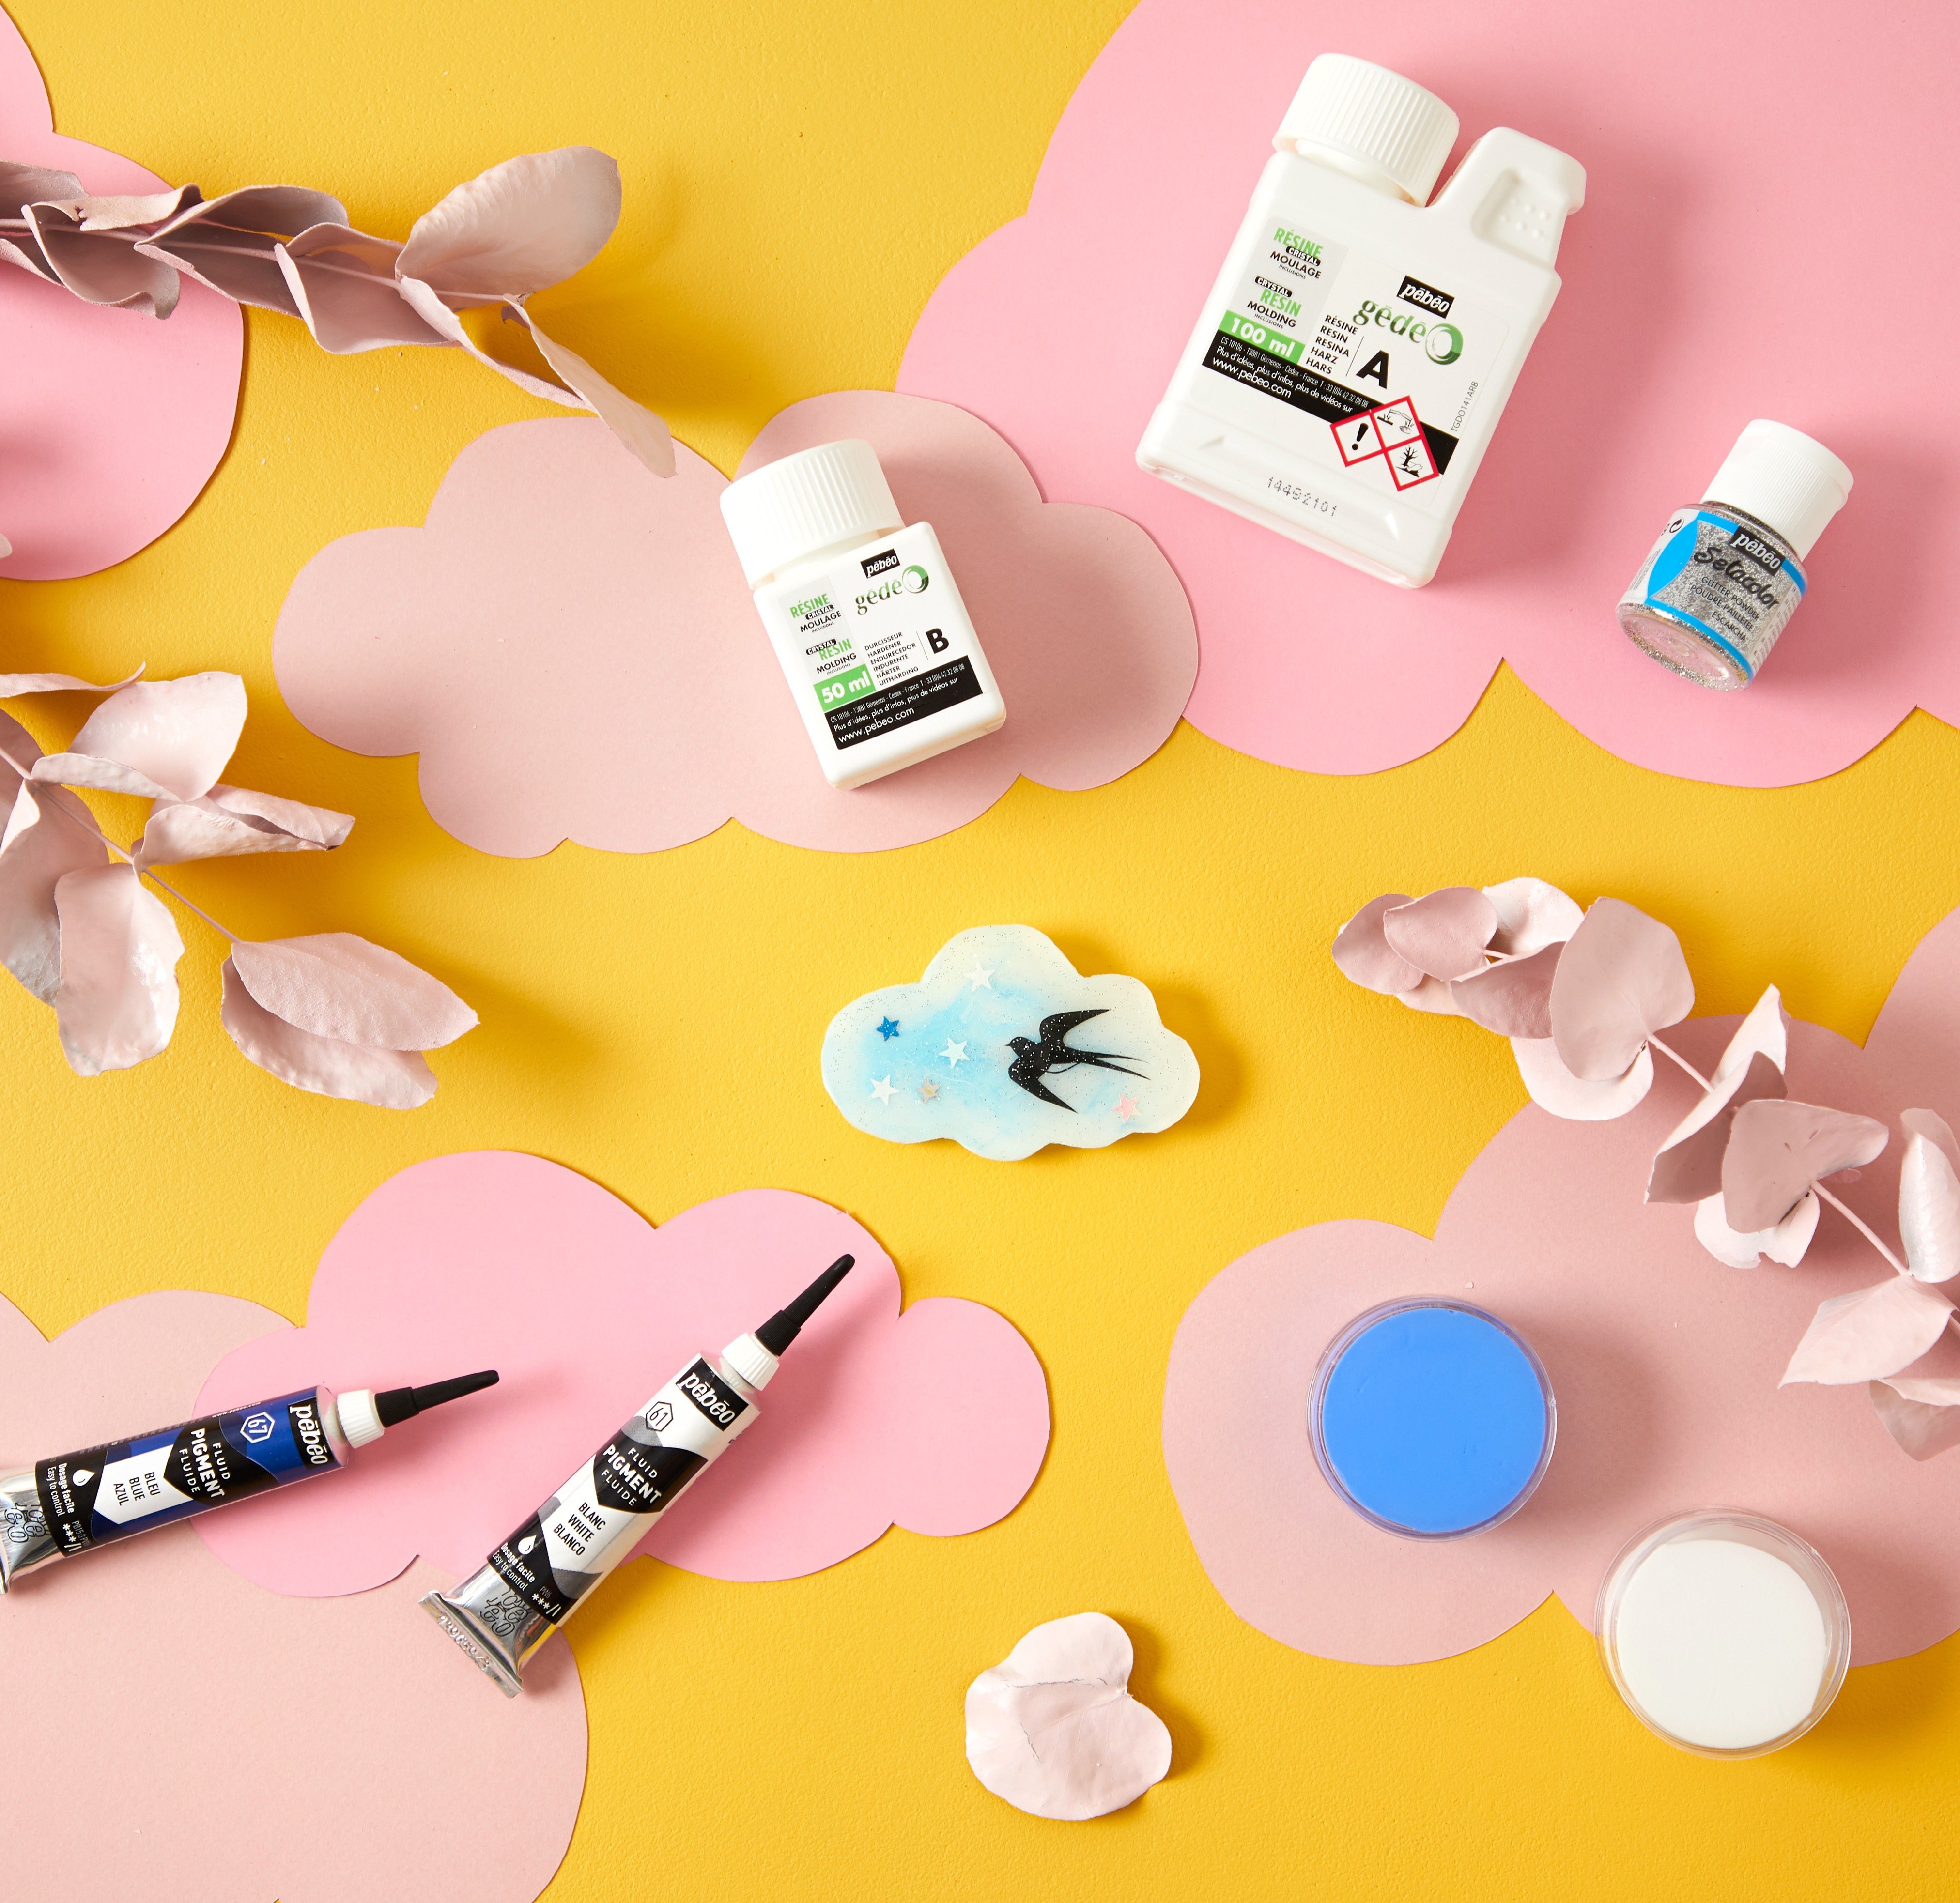
- Kit Résine cristal Gédéo
- Fluid Pigment coloris bleu 67 / blanc 65
- De la poudre paillette coloris argent
- Un motif de nuage au format de la broche
- Un dessin d’hirondelle, quelques paillettes étoile
- Une épingle à broche et de la colle contact (pour résine et métal)
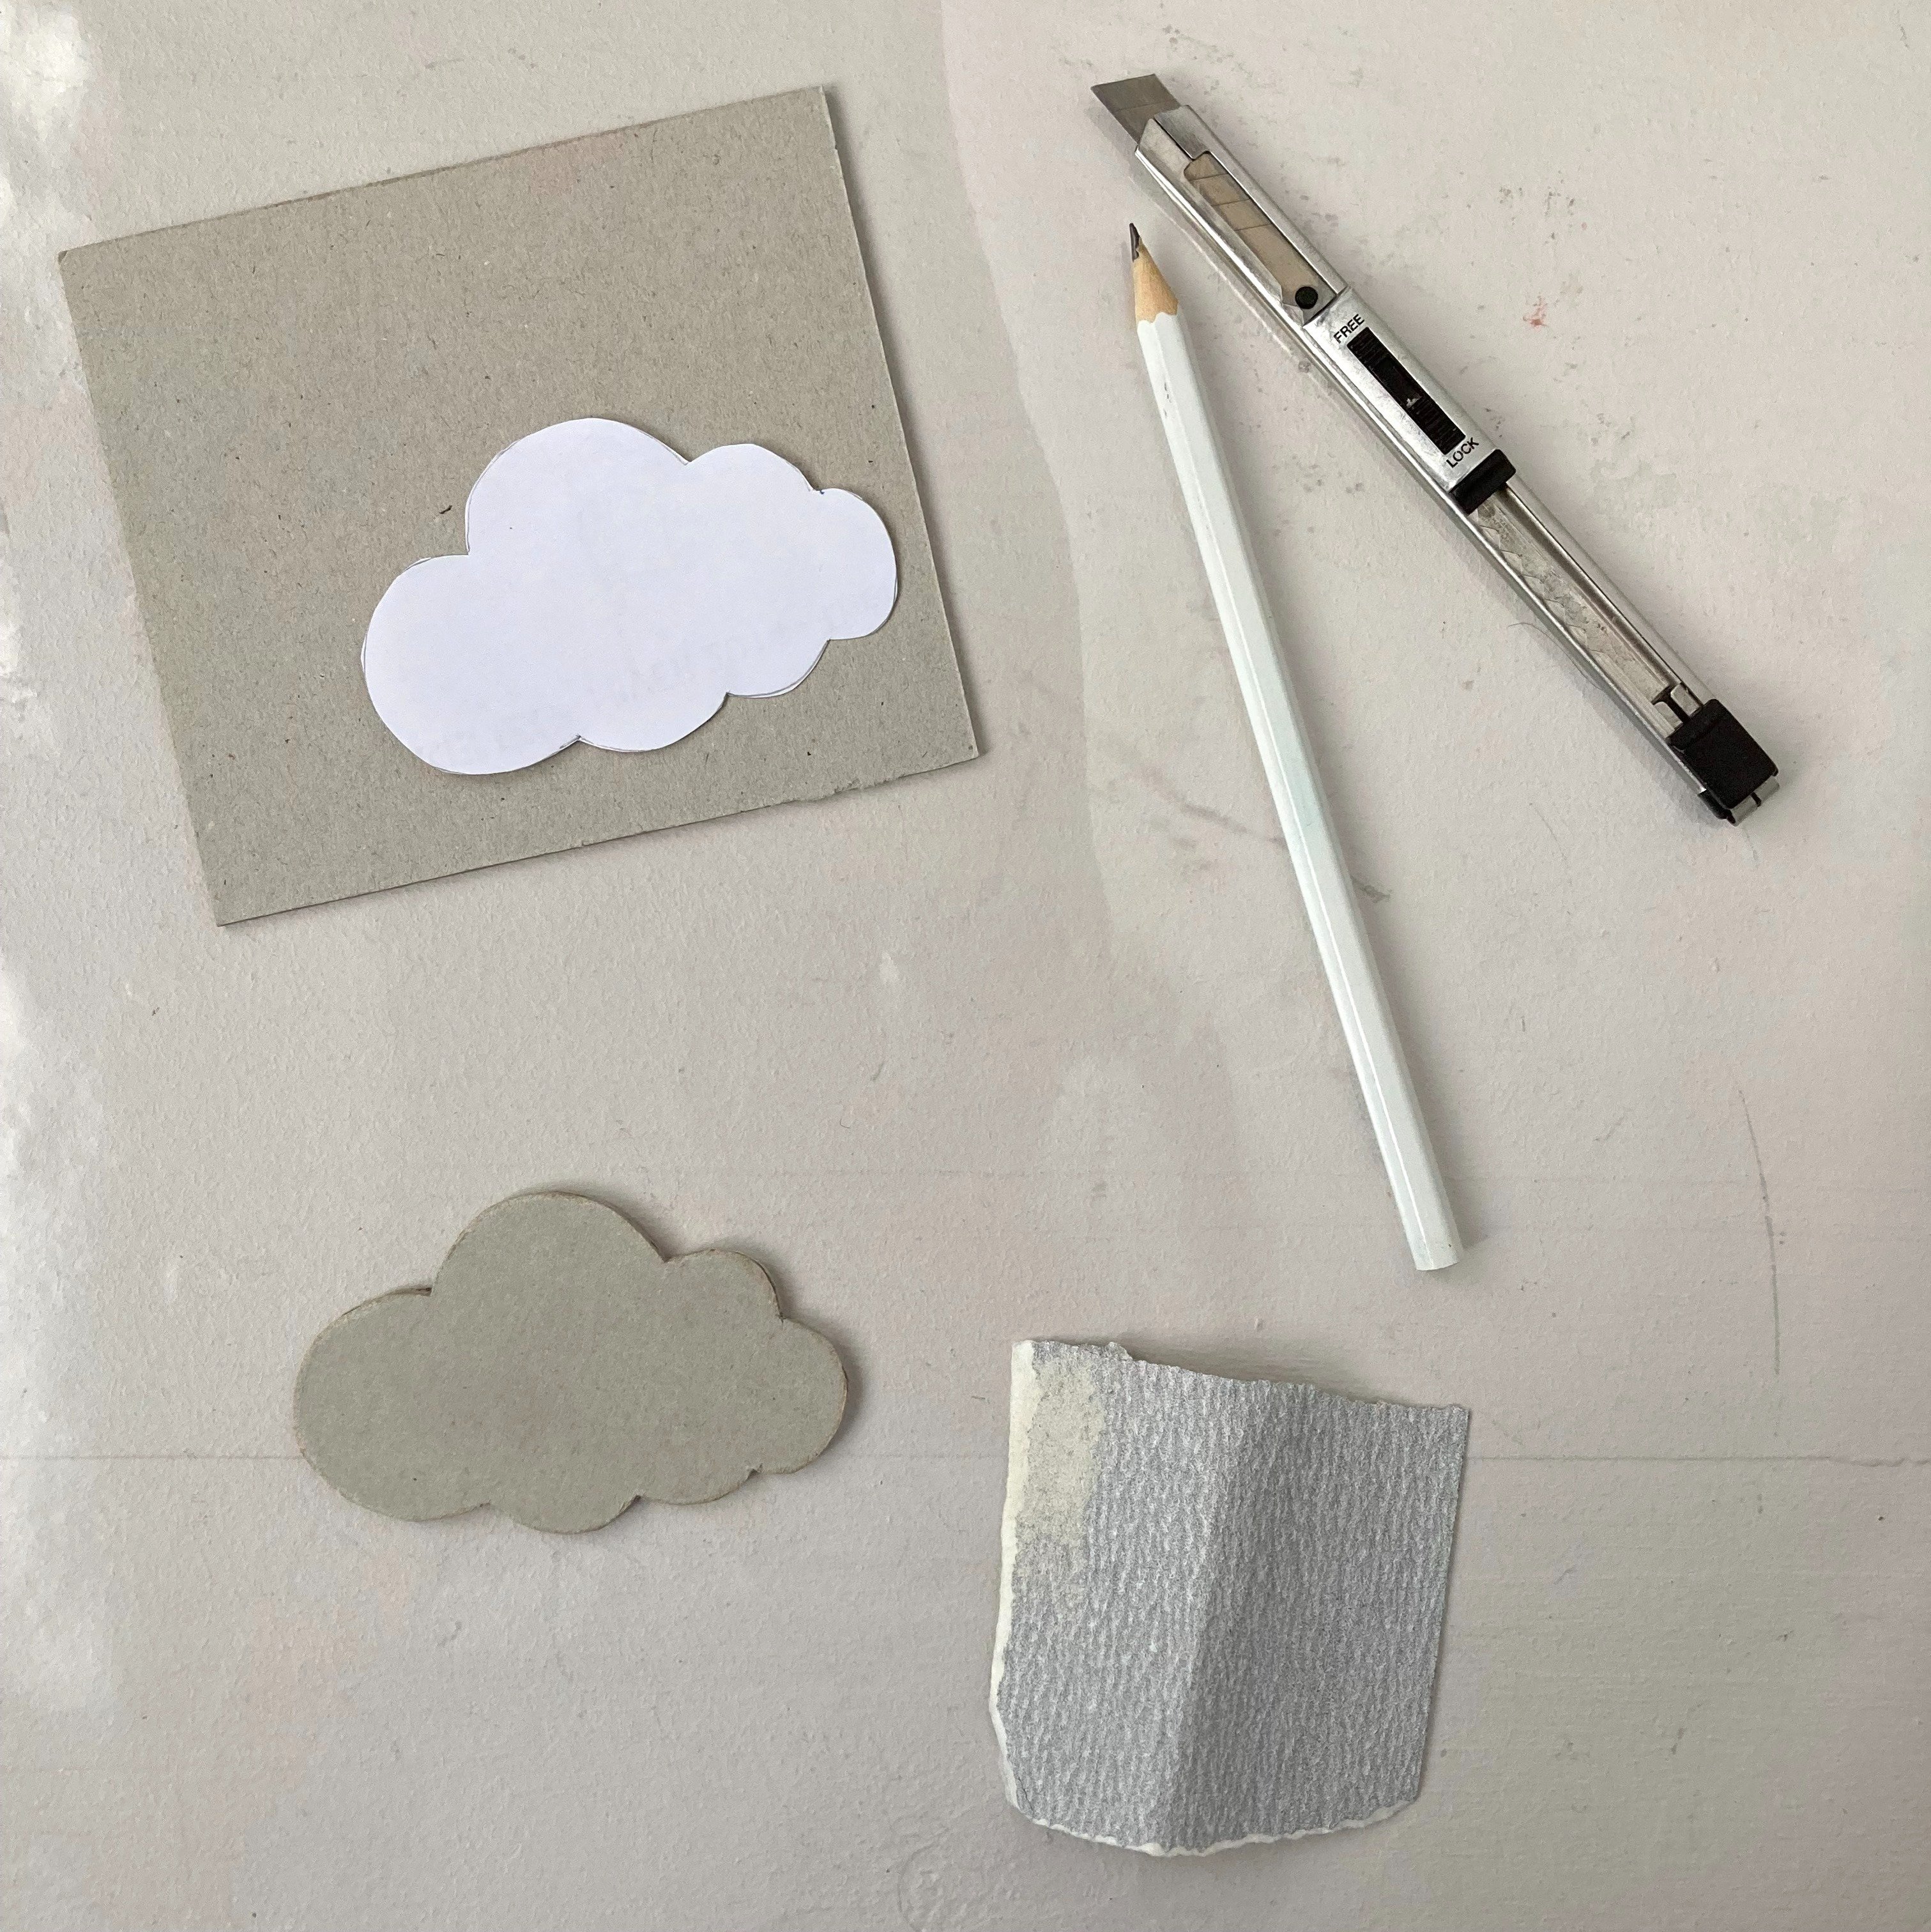
- Du carton gris de 4 mm d’épaisseur
- Un crayon, un cutter, un morceau de papier de verre fin
- Un petit rouleau
- Un gobelet en verre, des cure-dents
- De la bâche
- difficulté : Moyen
- Temps de réalisation : 2 heures pour la fabrication du moule / ½ heure de coulage de résine / 6 heures de prise de la première couche de résine / ½ heure de motif au Fluid Pigment / 48 heures de prise / ½ heure de coulage de la seconde couche / prise totale de la résine : au moins 48 heures
- Protégez la table avec la bâche.
- Commencez par réaliser le moule :
- Sur le carton, dessinez au crayon la forme du nuage, puis découpez-le au cutter.
- Poncez les bords pour rendre la tranche régulière
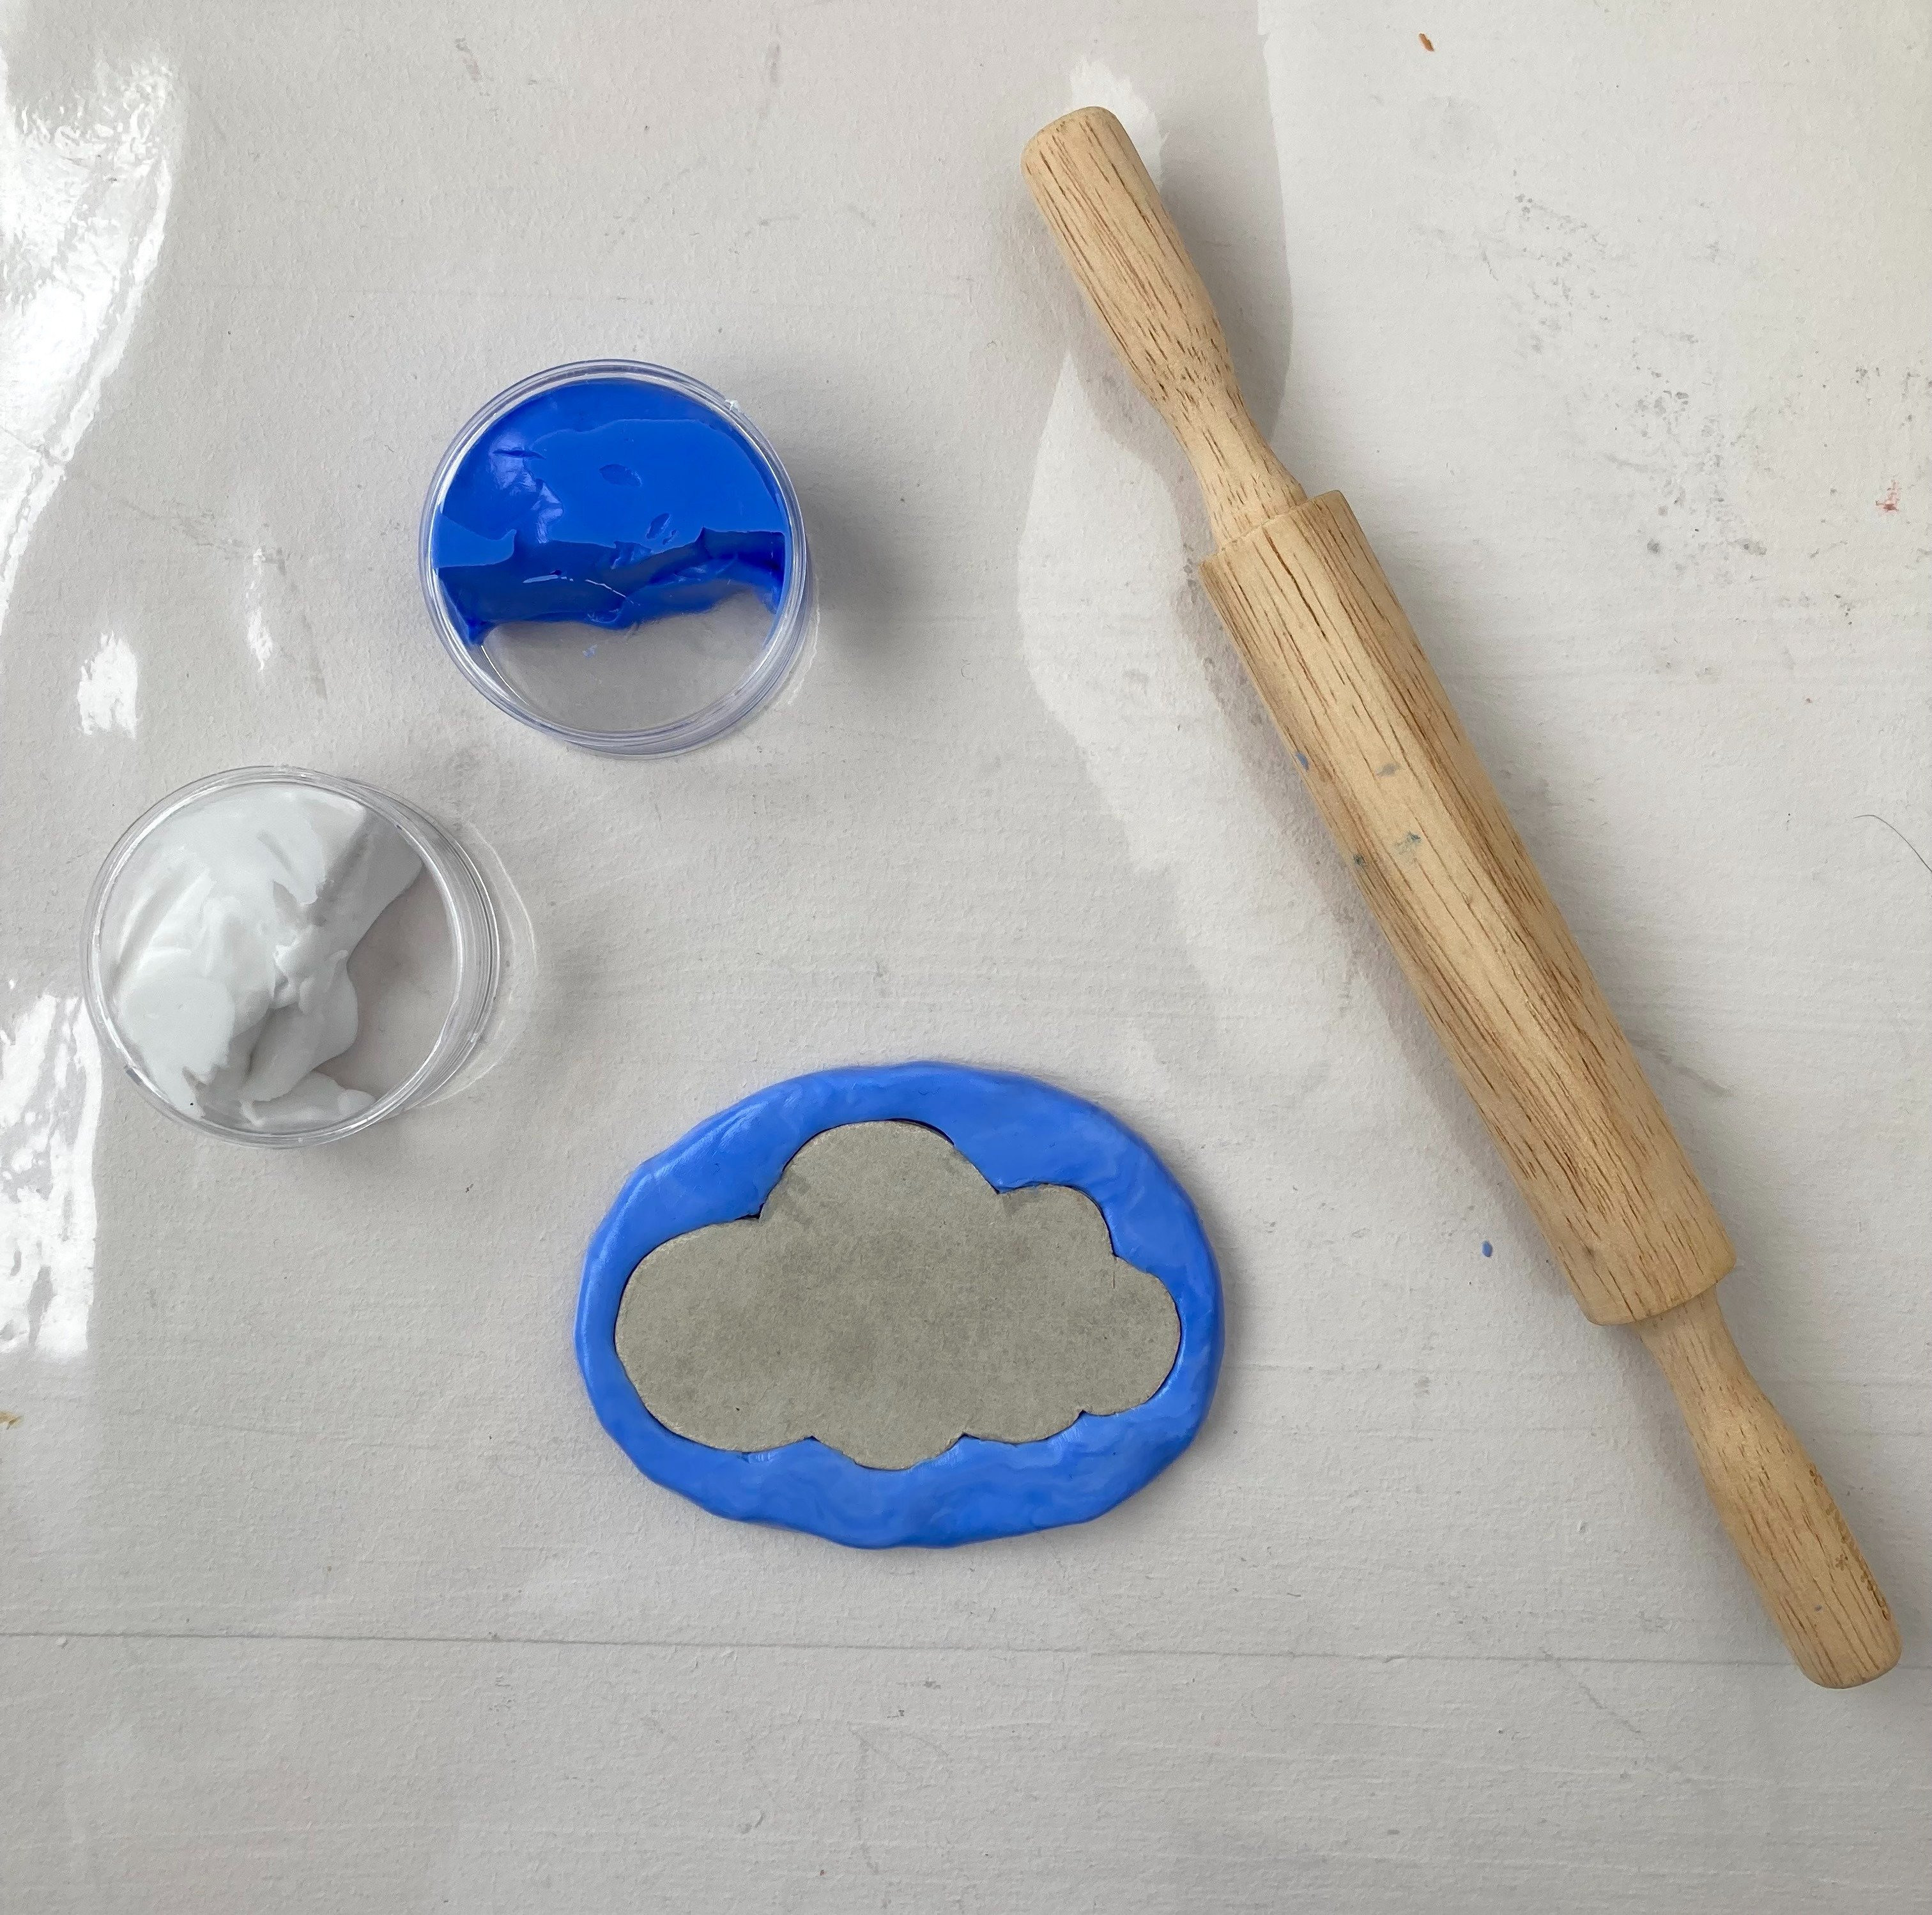
Mélangez à parts égales les deux composants du Siligum jusqu’à ce que le mélange soit homogène.
- Étalez-le au rouleau sur une épaisseur régulière d’environ 6 ou 7 mm pour former une plaque et enfoncez le nuage en carton jusqu’à ce qu’il affleure à la surface de la plaque, mais en laissant une épaisseur de 1 ou 2 mm dessous.
- Laissez sécher 15 minutes et enlevez le nuage en carton. Si besoin, enlevez délicatement au cutter les petites irrégularités du bord du moule.
- Mettez les gants de protection.
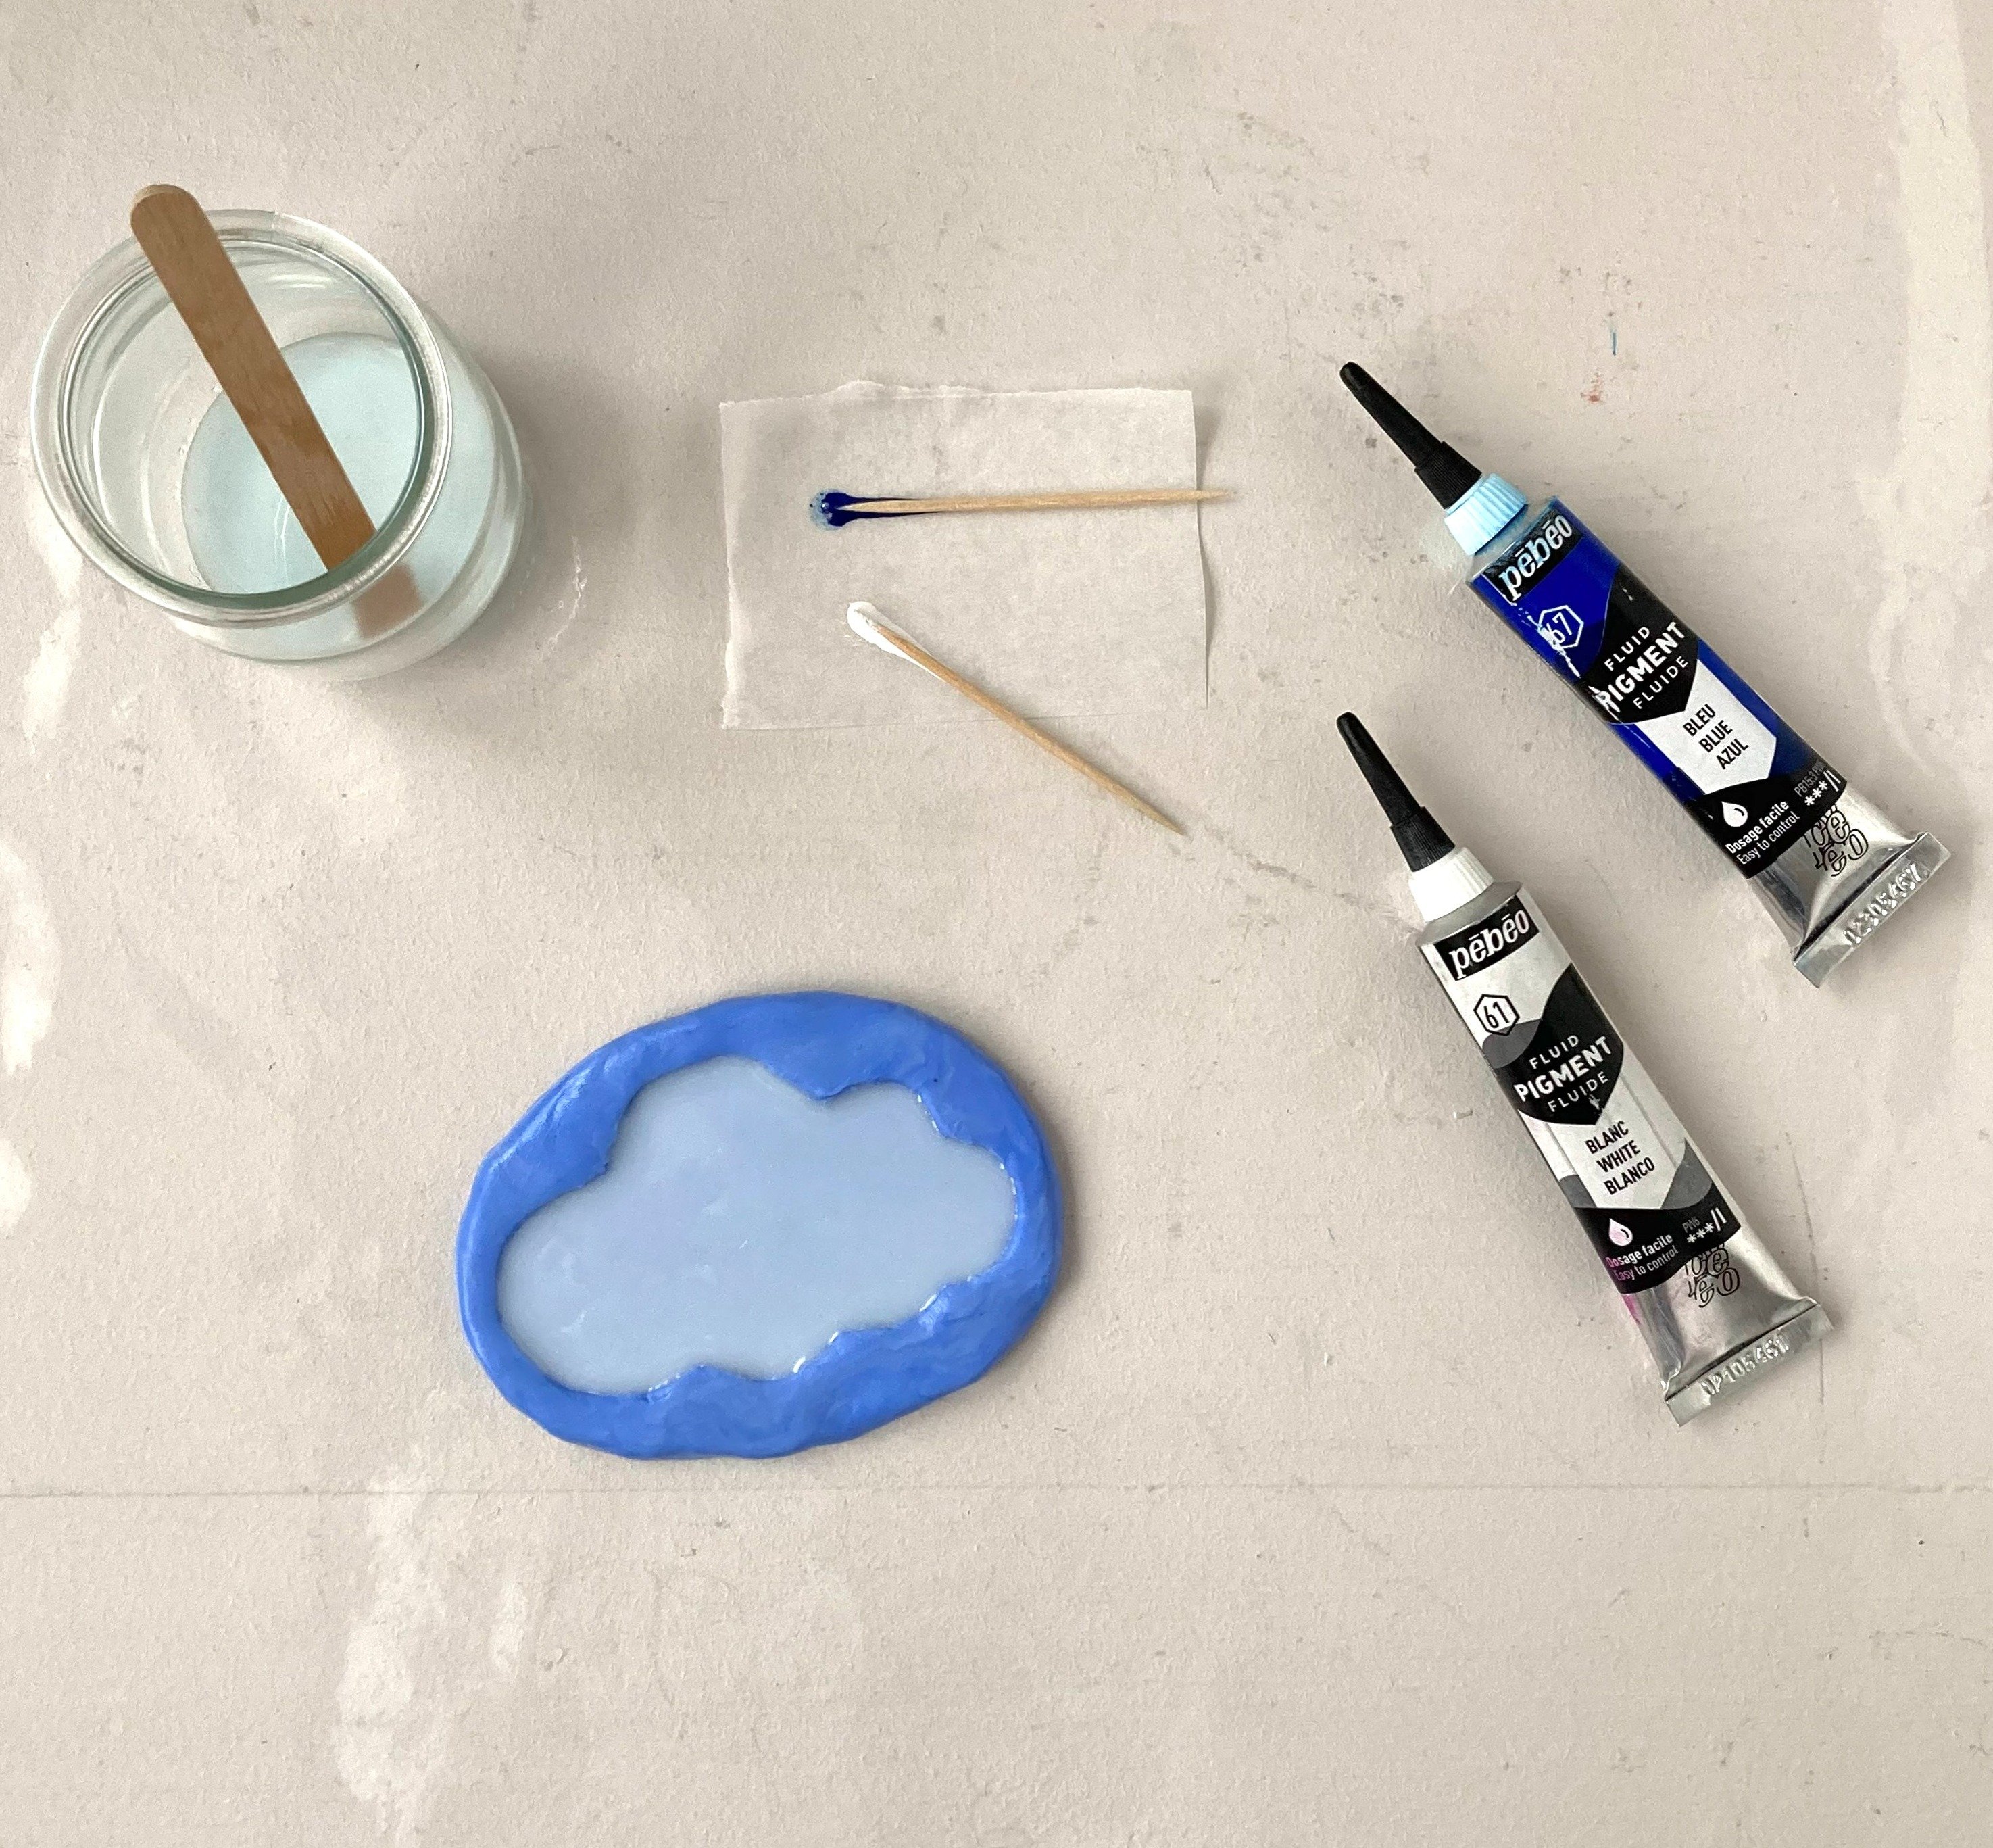
- Dans un pot en verre, préparez une résine opalescente : mélangez avec une spatule deux parts de résine et une part de durcisseur, ajoutez une pointe de Fluid Pigment blanc et bleu pour faire un blanc laiteux et mélangez bien pour unifier la résine. Laissez reposer 5 minutes jusqu’à ce que les bulles aient disparues.
- Assurez-vous que le moule en Siligum est bien à plat et coulez la résine sur la moitié de hauteur du moule (environ 2 millimètres).
- Aidez la résine à prendre sa place en tapotant le moule.
- Laissez prendre 6 heures.
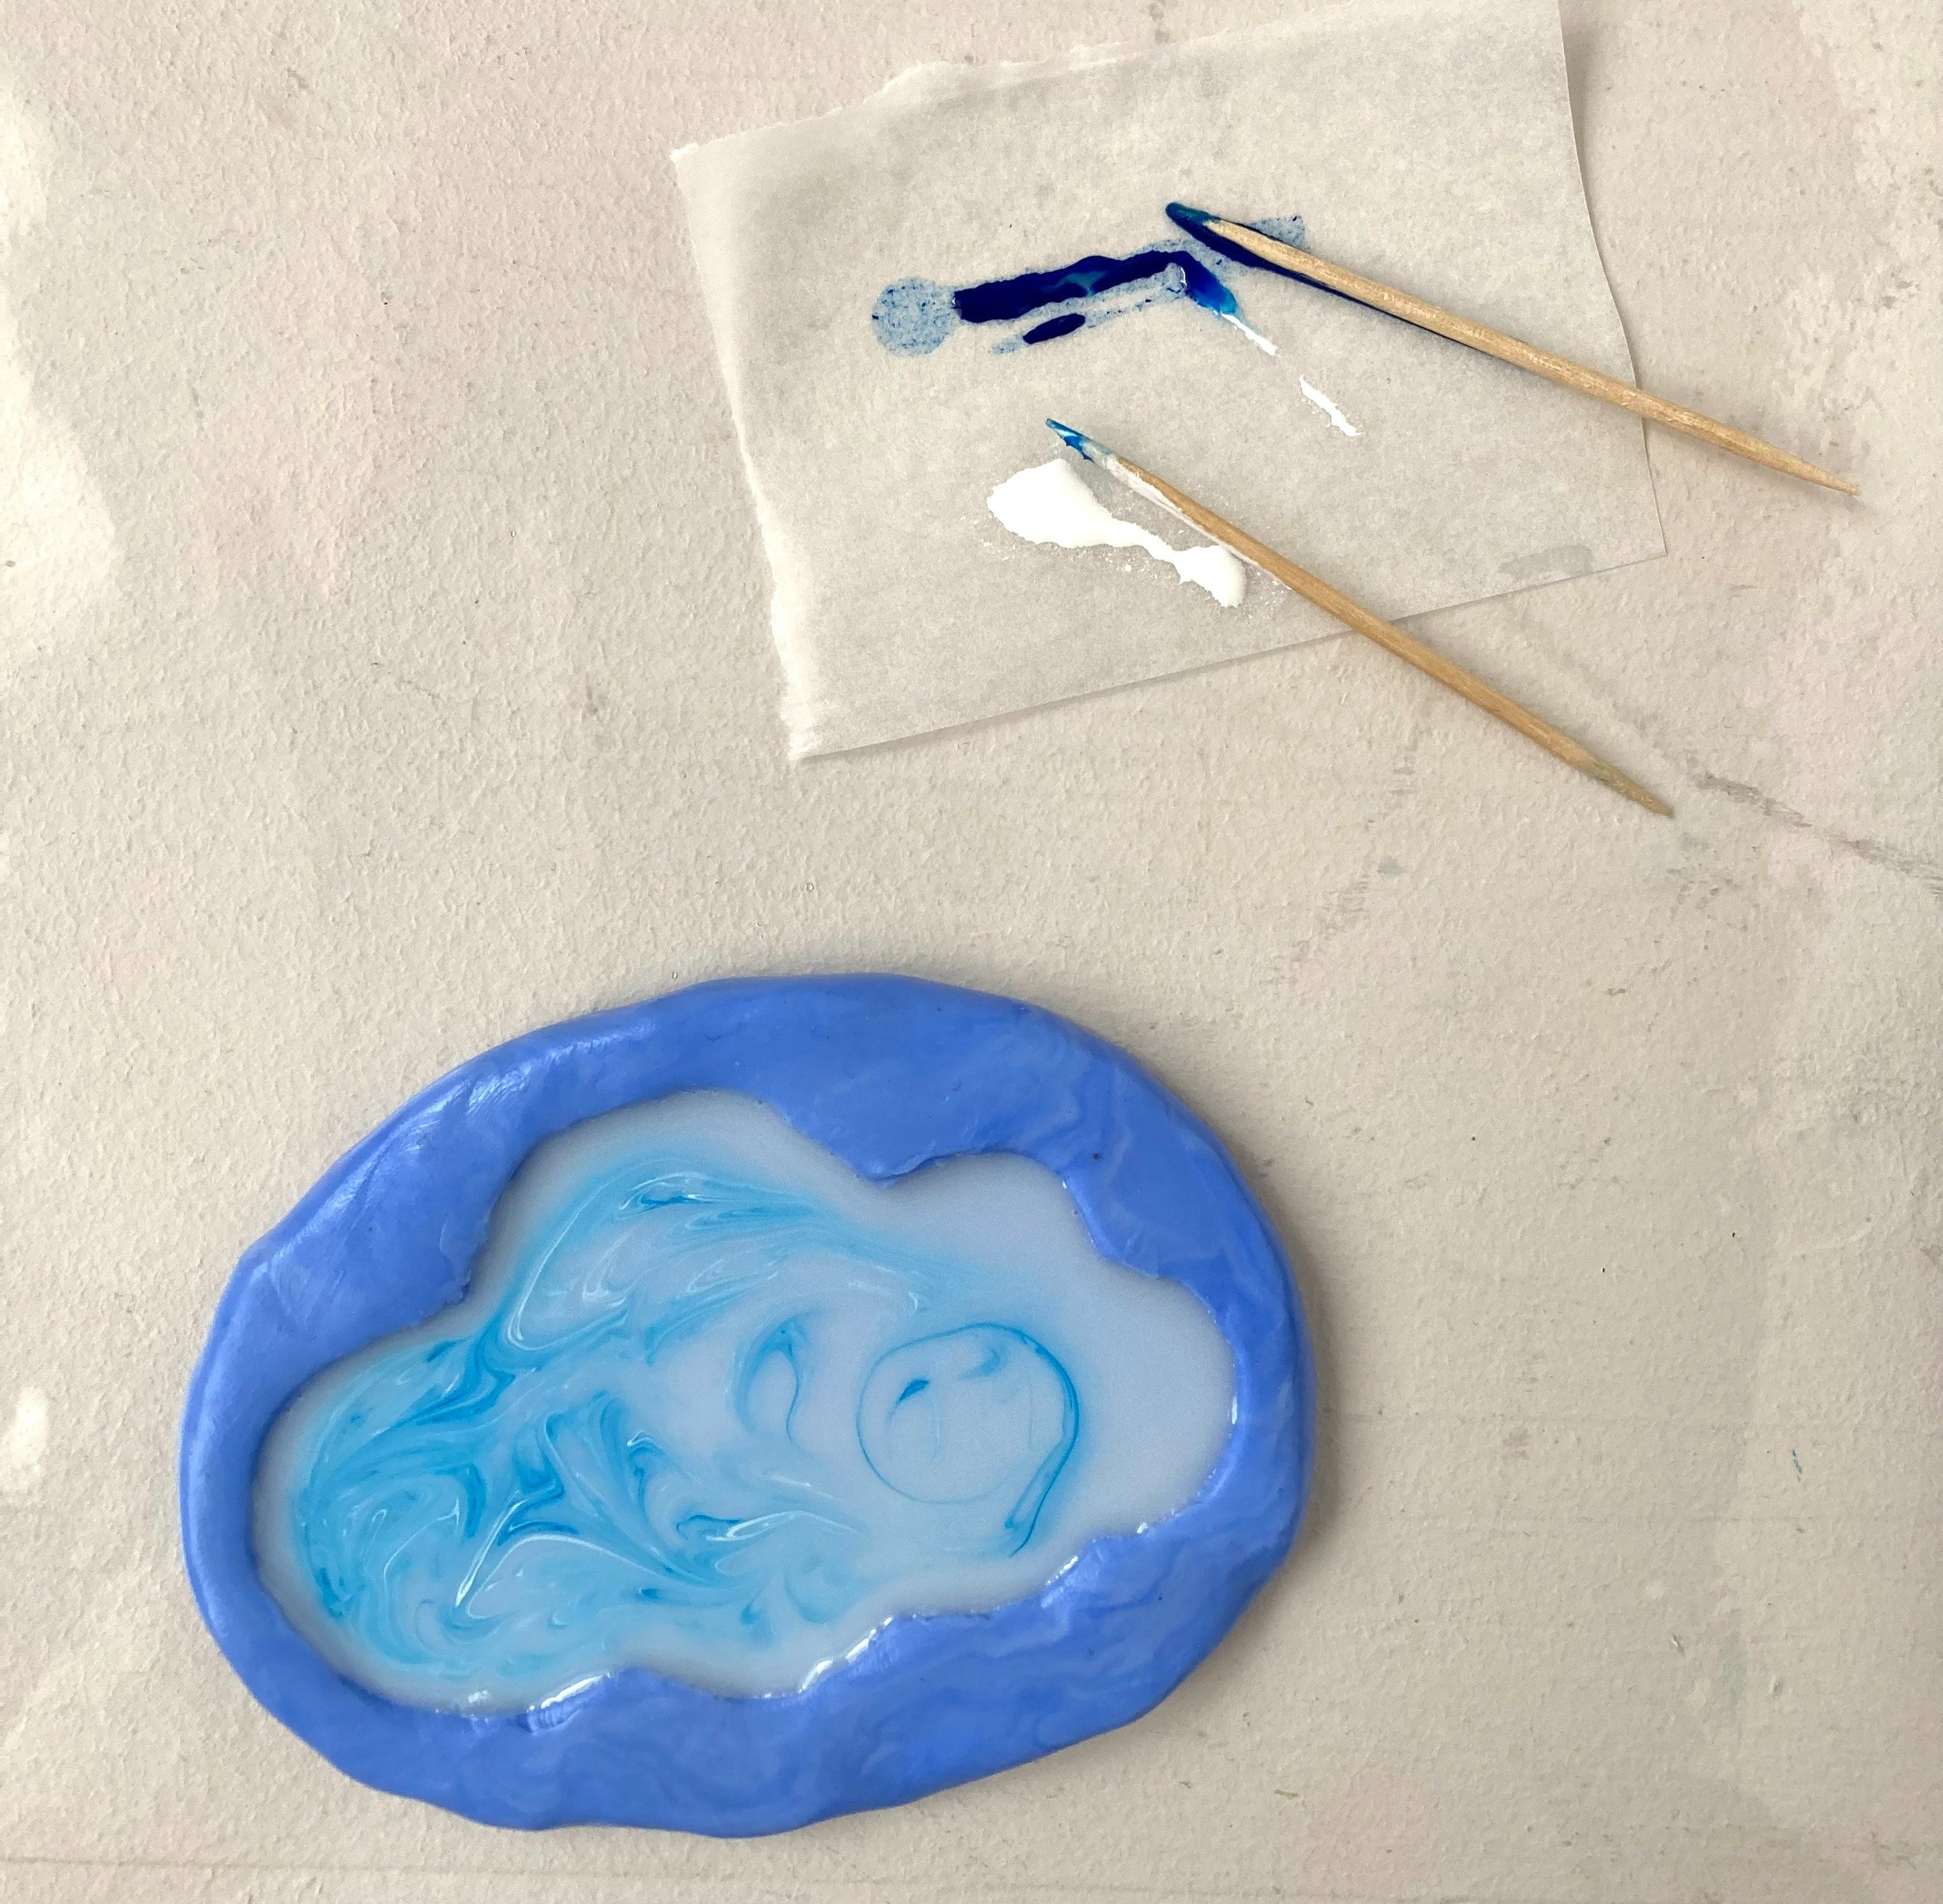
- Quand la résine s’est densifiée mais qu’elle
n’est pas encore prise, dessinez des spirales à l’aide d’un batonnet au Fluide
Pigment blanc et bleu
- Laissez sécher à plat à l’abri de la poussière pendant 48 heures (ou jusqu’à ce que la résine soit durcie).
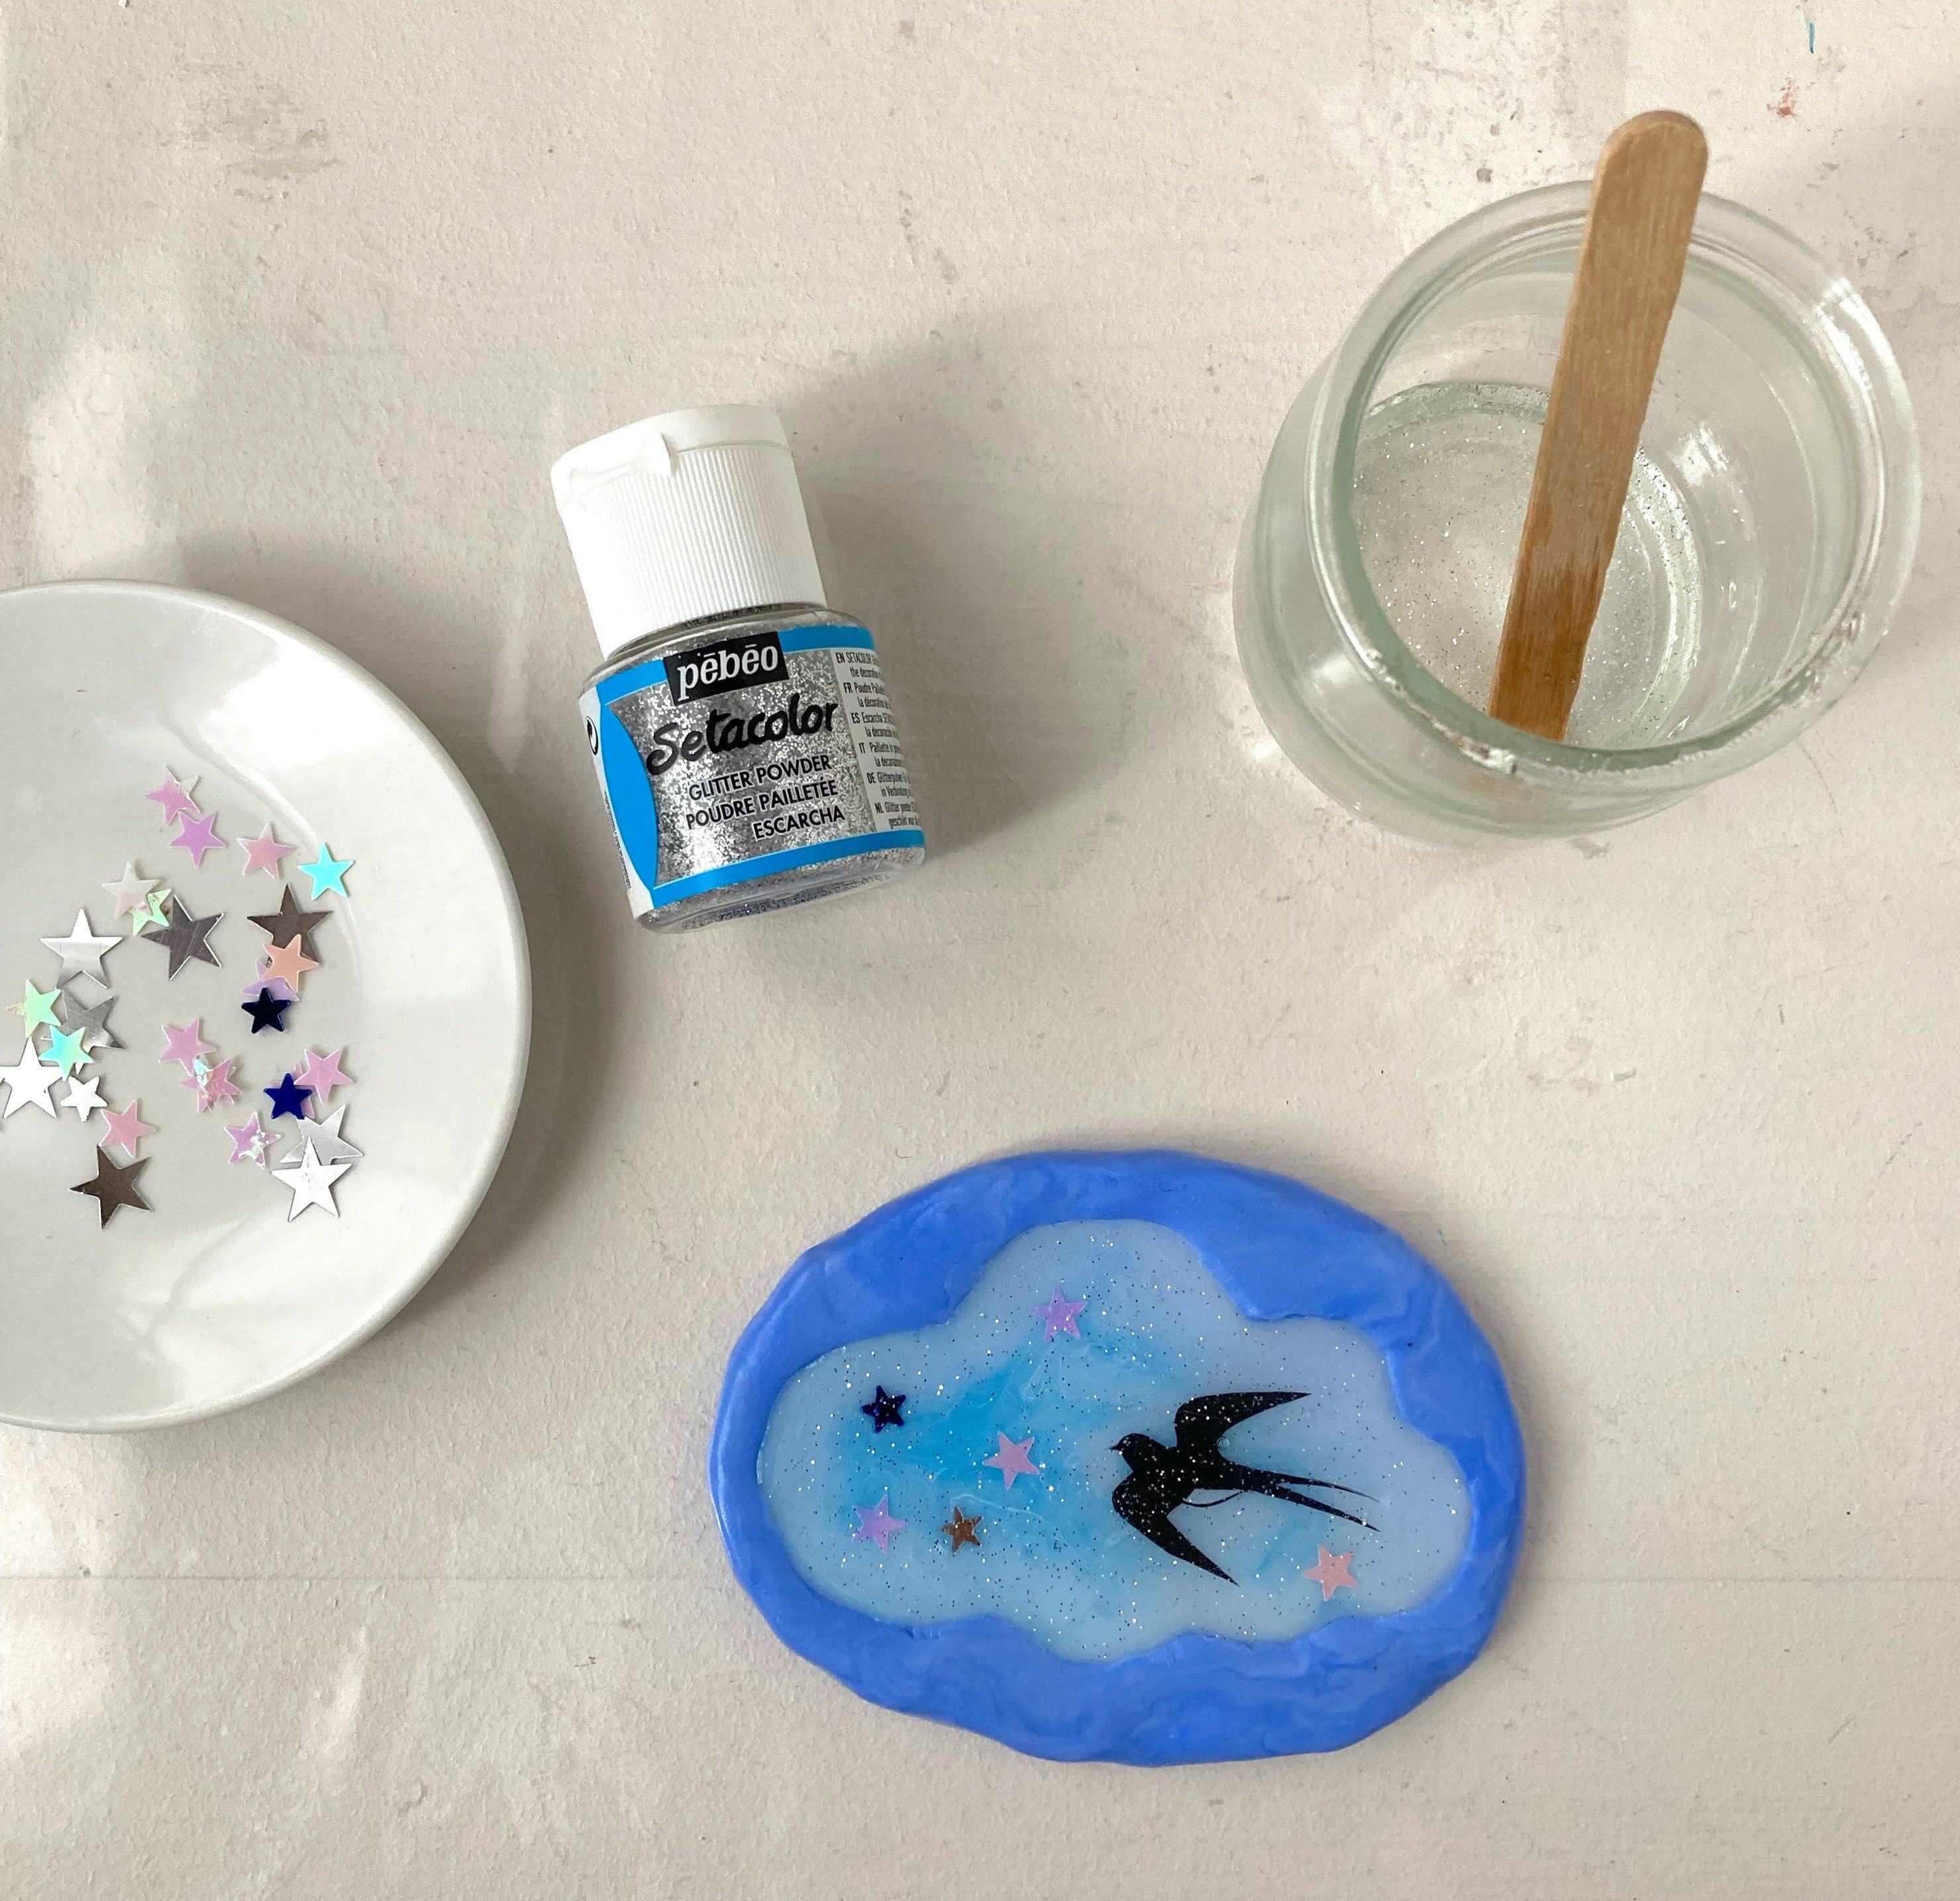
Préparez une résine transparente dans laquelle vous versez de la poudre de paillettes argentée. Laissez reposer 5 minutes jusqu’à ce que les bulles aient disparues.
- Placez l’hirondelle et les étoiles sur la surface en résine puis recouvrez avec la résine transparente jusqu’au rebord du moule. Si les éléments ont bougés, vous pouvez les remettre en place en les poussant doucement avec la pointe d’un batonnet, en veillant à ce que la couche de résine transparente recouvre bien l’ensemble de la surface du nuage.
- Laissez sécher au moins 48 heures (ou jusqu’à ce que la résine ait complètement durcie).
Démoulez le nuage. Si besoin, ébarbez-le avec le
cutter pour enlever les irrégularités des bordures.
Collez l’épingle à broche à l’arrière en suivant les instructions de collage du fournisseur.
Produits Connexes
à lire aussi


@PEBEO Suivre Pébéo sur Instagram


Newsletter
Inscrivez-vous à notre Newsletter et restez informé de nos actualités. Pour en savoir plus sur la gestion de vos données personnelles et pour exercer vos droits, cliquez, ici